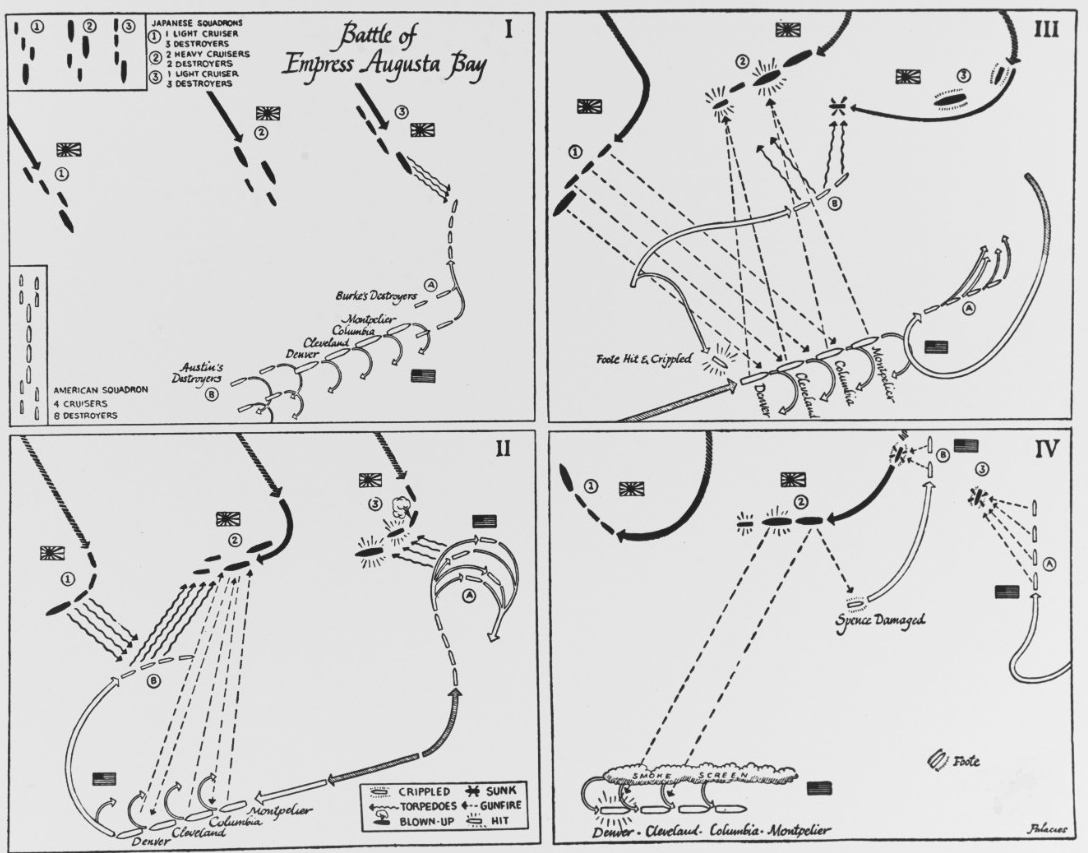
Battle of Empress Augusta Bay
1–2 November 1943
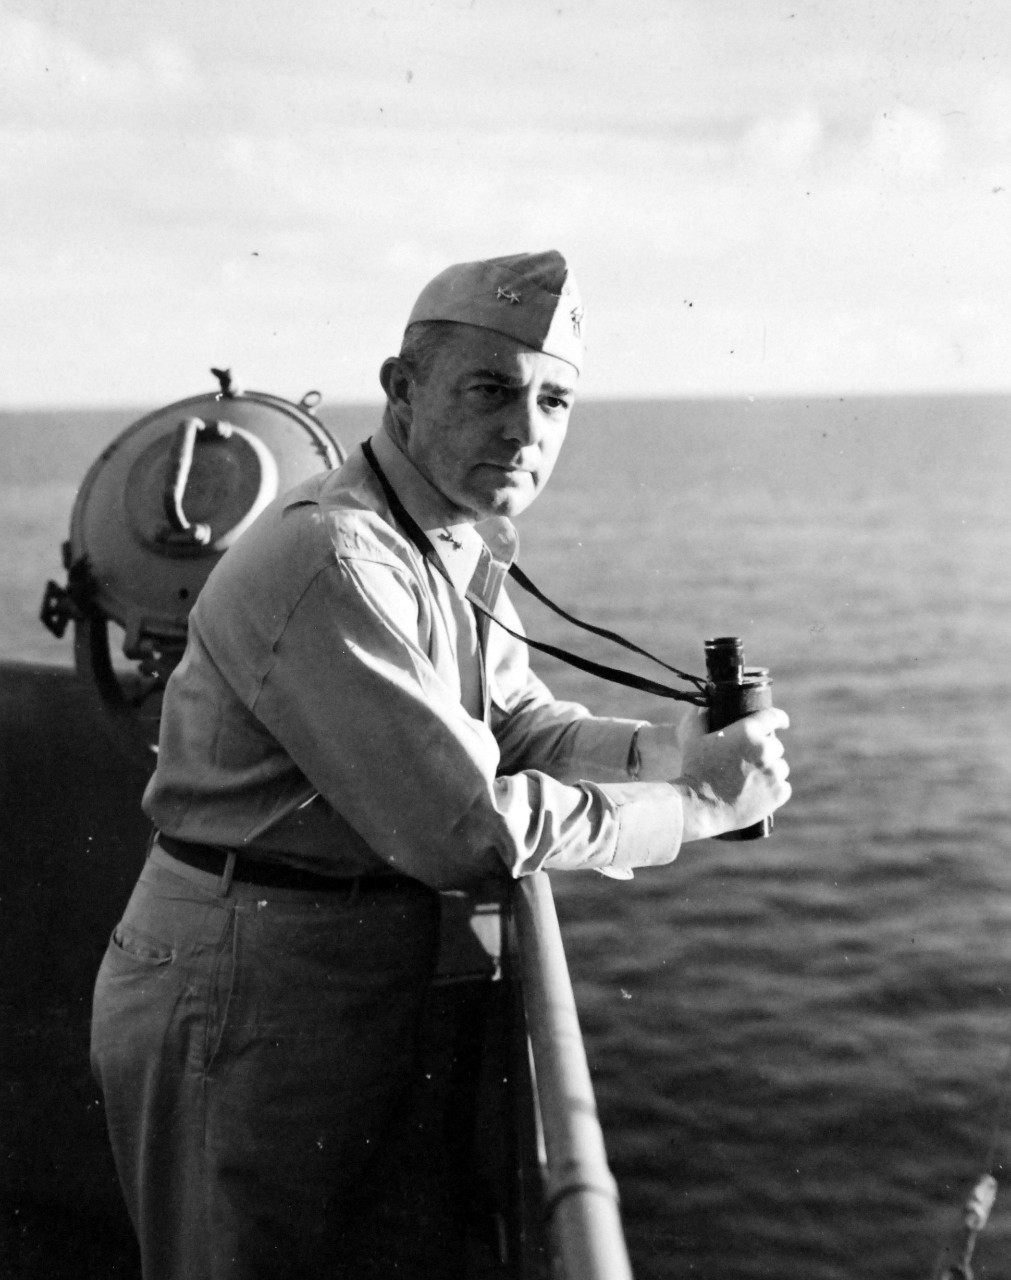
On 1–2 November 1943, the Navy inflicted a significant defeat to the Imperial Japanese Navy. As U.S. forces landed on Bougainville in the northern Solomon Islands, the Japanese sent a surface task force to counter the American actions. In a night engagement, using superior tactics and technology, Rear Admiral A. Stanton Merrill’s task force turned the Japanese away and secured the beachhead initially gained on Bougainville.
Between 7 August 1942 and 9 February 1943, the U.S. and Japan engaged in a campaign that saw a series of desperate battles—land, sea, and air—in the Solomon Islands for the possession of Guadalcanal and its important airstrip, Henderson Field. The six-month campaign proved the tipping point in the Pacific War. Henceforth, the United States embarked on the offensive, while the Japanese were forced to defend their successful territorial expansion made after Pearl Harbor.
With Guadalcanal secured, the Allied strategy was to follow up this victory with the reduction of the major Japanese base at Rabaul, New Britain. The plan adopted was codenamed Operation Cartwheel. Devised by the staff of General Douglas MacArthur, Supreme Allied Commander, South West Pacific Area (SWPA), in early 1943, the initial plan consisted of two primary elements: first, the Allied capture of northeastern New Guinea and, second, a concurrent advance up the central and northern Solomon Islands to New Britain by Vice Admiral William F. Halsey Jr.’s Third Fleet.
At the Quebec Conference (17–24 August 1943), however, the Allies decided to isolate and bypass Rabaul rather than capture the base. Cartwheel, even with this significant modification, had a significant impact on Japanese forward defenses, logistics, and communications, and set the stage for the Allied advance beyond New Guinea toward the Philippines. It also influenced U.S. operations under Admiral Chester W. Nimitz against the Japanese-occupied island groups in the central Pacific.
The following major subordinate operations of the multi–pronged Cartwheel were executed in the SWPA to November 1943. The New Georgia campaign (Operation Toenails) began on 30 June 1943 and associated naval surface actions were fought at the Battle of Kula Gulf (5–6 July), the Battle of Kolombangara (12–13 July), and the Battle of Vella Gulf (6–7 August). These were followed by landings on the island of Vella Lavella (15 August 1943). The Battle of Vella Lavella, the last naval battle in the central Solomons, took place during the night of 6–7 October, just as the island had been secured by U.S. forces. Meanwhile, additional operations to isolate Rabaul saw the continuation of the New Guinea campaign with Army landings on Woodlark Island and Kiriwina (Operation Chronicle) on 30 June 1943; capture of Lae, New Guinea (Operation Postern) on 5 September 1943 by U.S. Army airborne and Australian ground forces; and a landing of New Zealand forces on the Treasury Islands (Operation Goodtime) on 27 October 1943. With these operations, the Japanese were forced into the retrograde, if not speedily, at least steadily.
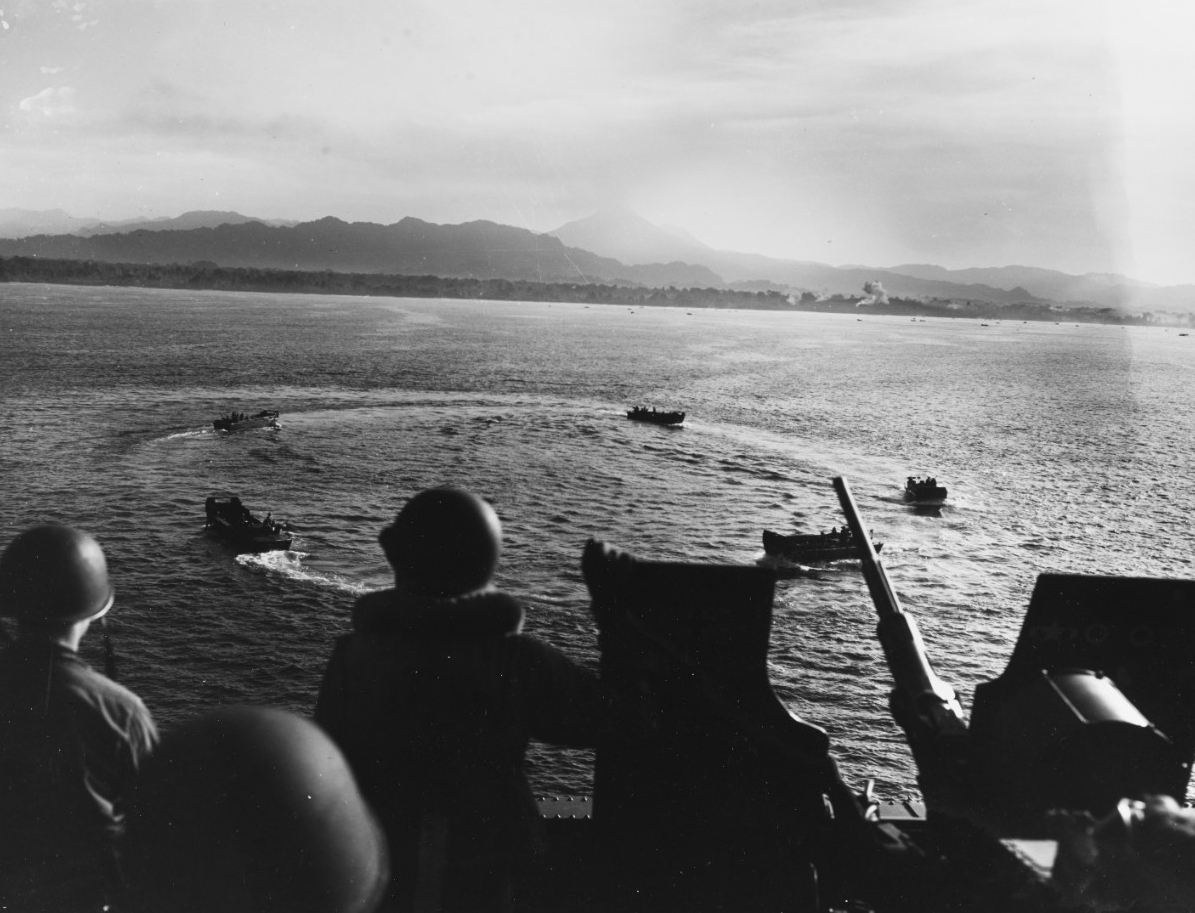
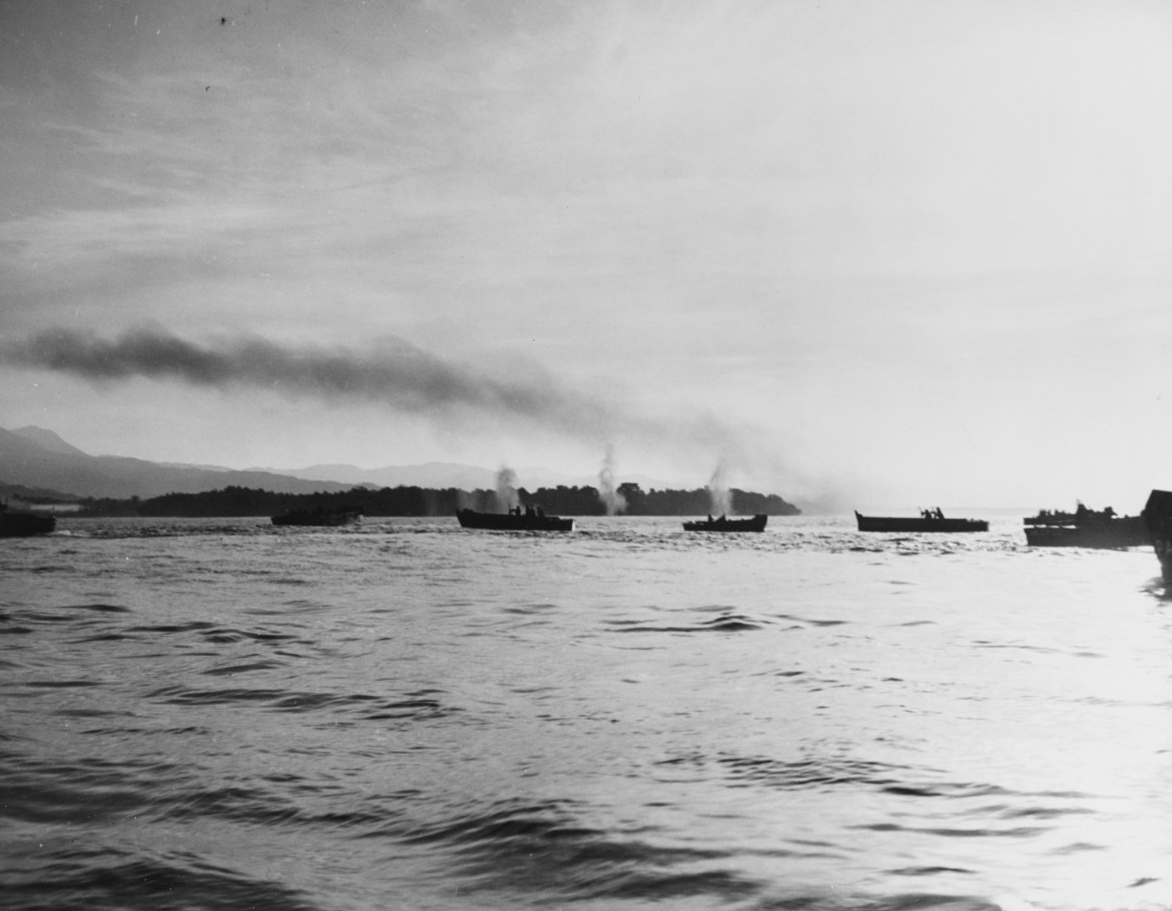
The next step in the Allied drive to victory in the Pacific was for the invasion of the northern Solomon Island of Bougainville. While MacArthur had to approve all major plans, he gave operational control and planning for the operation to Halsey and his staff at Nouméa on New Caledonia. The landing was to be conducted on 1 November 1943, halfway up the island’s western shore at Cape Torokina, just north of Empress Augusta Bay. Halsey assigned Rear Admiral Theodore Wilkinson, Commander, Third Fleet Amphibious Forces, to direct the landings from his flagship, the attack transport George Clymer (APA–27). Major General Alexander Vandegrift’s I Marine Amphibious Corps, consisting of the 3rd Marine Division (reinforced), the 37th U.S. Infantry Division, and the Advance Naval Base Unit No. 7, constituted the landing force, while Task Force (TF) 39, commanded by Rear Admiral A. Stanton Merrill, was to cover the landings. His task force, consisting of Cruiser Division (CruDiv) 12 [the light cruisers Montpelier (CL–57), Cleveland (CL–55), Columbia (CL–56), and Denver (CL–58)] supported by Destroyer Division (DesDiv) 45 and Destroyer Division (DesDiv) 46, was to screen the transports and support vessels from Japanese air and surface attack. The landing was accomplished as planned on 1 November with over 14,000 men and 6,200 tons of materiel put ashore in eight hours.
Meanwhile, Admiral Koga Mineichi, commander of the Japanese Combined Fleet, kept most of the Japanese Eighth Fleet beyond the range of U.S. airpower at Truk. Vice Admiral Ōmori Sentarō, however, was at Rabaul on 30 October with Cruiser Division 5. Vice Admiral Samejima Tomoshige, Commander, Japanese Eighth Fleet, wanted to send the cruiser division back to Truk, but Koga overruled him. With reports of the landings at Cape Torokina, Samejima dispatched Ōmori to escort a counter-landing force of transports with 1,000 troops, but this link-up did not occur as planned. Ōmori then requested that he be allowed to attack the American transports that he assumed were still in Empress Augusta Bay. It was Ōmori’s hope that he could replicate the successful night action executed by Vice Admiral Mikawa Gunichi’s heavy cruisers at Savo Island on 9 August 1942 (see the NHHC blog contribution “Train As You Will Fight”). With his Torokina Interception Force, the heavy cruisers IJN Myoko and IJN Haguro; the light cruisers IJN Sendai and IJN Agano; and the destroyers IJN Shigure, IJN Samidare, IJN Shiratsuyu, IJN Naganami, IJN Hatsukaze, and IJN Wakatsuki, he intended to do what Mikawa did not and attack the U.S. transports.
Although Ōmori expected to meet only transports, Merrill’s TF 39 was already steaming north to intercept the Japanese. Having been informed of the Japanese approach by reconnaissance aircraft, Merrill selected a meeting point well west of Empress Augusta Bay and maneuvered accordingly. He deployed his force on a north–south line of bearing of unit guides, the leading destroyer three miles ahead of the flagship Montpelier. The cruisers were spaced 1,000 yards apart, and there was a 3,000-yard interval between the rear cruiser and the flagship of DesDiv 46. Although this was the formation typically employed for a night action, it differed in one essential respect from the tight column used in other night engagements during the preceding year. As Vice Admiral William S. Pye, president of the Naval War College commented, "The destroyers were not tied in close to the main battle line, and held there within gun range. They were loose, well removed from the cruisers, with flexibility and freedom of action. They were used offensively instead of defensively, and were sent in to fire their torpedoes before opening gunfire."1
TF 39 approached the rendezvous at 20 knots, so that the wakes of the ships would not attract reconnaissance aircraft. Although many circumstances replicated those at Savo Island on 9 August 1942, there was one major difference. Merrill had exact knowledge of Ōmori's movements. He also determined that the best defense for the transports was to drive the Japanese away. His plan was to position his cruisers across Empress Augusta Bay as a cordon to prevent Japanese entry. He proposed to push the enemy westward to gain maneuver space and, in order to protect his cruisers, to fight at ranges close to the maximum effective range of the Japanese Type-93 “Long-Lance” torpedoes (16,000–20,000 yards). He planned to detach the two destroyer divisions for an initial torpedo attack and to hold his cruisers' gunfire until the destroyers’ torpedoes struck home. This gave his destroyer commanders complete freedom of action once they were detached.
The Japanese, after receiving a faulty report that the U.S. transports were unloading, advanced in three columns toward Empress Augusta Bay at 0200. While some of Ōmori’s ships mounted radar, the operators of the equipment were poorly trained. So, like Mikawa at Savo Island, Ōmori relied on visual spotting. Unlike that engagement, however, the U.S. radar sets would prove far more capable than the Japanese spotters with binoculars. At 0227, combat information centers (CICs) on board TF 39’s ships began to detect one of the Japanese columns at a range of 35,900 yards. With this contact, Merrill changed course to due north and deployed athwart the Japanese line of approach. Then, the four destroyers in the vanguard of then-Captain Arleigh Burke’s Destroyer Squadron (DesRon) 23 deployed according to plan to deliver a torpedo attack. Meanwhile, Merrill ordered his cruisers to reverse course with a simultaneous 180-degree turn. This turn was also conducted by the rearward destroyers, which then placed them in the lead. The latter were to attack the Japanese force with torpedoes, once they acquired a target. These maneuvers saw the engagement become three separate actions—one for the cruisers and one apiece for each of the destroyer forces.
A Japanese reconnaissance aircraft dropped a flare over Merrill’s force, which was sighted by the light cruiser IJN Sendai. While Sendai’s column maneuvered for their attack, which saw them launch eight torpedoes, Merrill waited for Burke’s torpedoes to strike. Disappointingly, none of them struck home. With an updated report on the Japanese position from his CIC, however, Merrill ordered his cruisers to open fire. The U.S. radar-controlled gunfire concentrated on Sendai and soon the light cruiser was aflame. Two of the accompanying Japanese destroyers collided while trying to avoid the incoming U.S. fire. The Japanese returned fire, but their opening salvos were short and off target. Their effective illumination rounds, however, forced Merrill to deploy smoke and to maneuver in order to maintain distance. Despite the failure of Burke’s torpedo attack, the U.S. forces got the best of the opening rounds of the engagement
The gunfire from the U.S. ships proved very accurate and forced the Japanese heavy cruisers and their accompanying destroyers to maneuver frantically, resulting in further collisions between Japanese ships. In the meantime, Merrill maneuvered his cruisers to complicate the determination of firing solutions for the Japanese, while simultaneously enabling his gunners to strike the Japanese columns. Despite a high hit rate, the U.S. gunfire did not have great effect. The Japanese counter-fire improved as the U.S. line was straddled and Denver took three hits. Merrill executed a 180-degree turn to move beyond Japanese torpedo range.
The action then became more confused and Ōmori believed his torpedoes had struck the U.S. cruisers and sank them. In actuality, they had disappeared into the smoke. The action also became chaotic for the U.S. destroyer divisions as they maneuvered to consolidate in the dark. In the course of doing so, they did manage to rake the damaged Hatsukaze with gunfire and sink her.
As the action continued, the destroyer Foote (DD–511) maneuvered to rejoin her division when a torpedo intended for a U.S. cruiser blew her stern off and the ship went dead in the water. The destroyers Thatcher (DD–514) and Spence (DD–512) side-swiped each other, but neither sustained any critical damage. Meanwhile, Sendai continued to burn, but only sank after Burke’s destroyers administered the coup de grâce with torpedoes. After some additional ineffectual exchanges, Merrill ordered the destroyers to rejoin the flagship at 0454, while the cruisers steamed westward in search their quarry.
With the approaching light, surface contact was broken, but each side sortied their air assets. As the Japanese aircraft approached, Merrill’s force had already deployed into a circular antiaircraft formation. In the ensuing action, the Japanese suffered 17 aircraft lost in exchange for two superficial hits by the Japanese. Samuel Eliot Morison ascribed this success to Halsey’s insistence on frequent antiaircraft training.2 After the air attack, Merrill returned to Empress Augusta Bay on Halsey’s orders to cover the withdrawal of transports and then moved with his force to Purvis Bay to refit and replenish after the battle. With the battle over, the Japanese had two ships, a light cruiser and destroyer, sunk, and four others, two heavy cruisers and two destroyers, heavily damaged. Although the Americans suffered damage to seven ships, none were sunk and there were relatively light casualties, especially given the amount of ordnance fired.
Despite Ōmori’s intent, there was no repeat of Savo Island. Instead, the battle, if not a spectacular success, was a clear U.S. victory. Merrill had adeptly assessed the situation and deployed his force accordingly. He had seen fit to release his destroyers for torpedo attack and to coordinate their strike with cruiser gunfire. Although it may not have produced the result anticipated, this change in the tactical employment of torpedoes and gunfire clearly demonstrated that the Navy had learned much from their engagements with the Imperial Japanese Navy in the months since the Guadalcanal campaign. The bloody lessons learned in Ironbottom Sound forced the fleet to adapt and to modify its tactics. In the months since, as Trent Hone noted in his prize-winning essay “Guadalcanal Proved Experimentation Works,” the Navy had developed a school that familiarized captains and their crews with effective methods for maximizing their shipboard information systems.3 This resulted in more formalized techniques that exploited the utility of each ship’s CIC. Merrill then used the CICs to coordinate his distributed formation and blunt the Japanese attack at Empress Augusta Bay. Furthermore, as Morison noted, “[Merrill] was bold when boldness was needed and cautious when caution was required; in the face of a constantly changing tactical situation he kept his poise, confidence and power of quick decision. His swift simultaneous turns to avoid enemy torpedoes, while he was pouring out continuous rapid fire, were masterpieces of maneuver.”4
—Christopher B. Havern, Sr., Historian, Naval History and Heritage Command
____________
1 Morison, Samuel E., History of United States Naval Operations in World War II, Vol. VI, Breaking the Bismarcks Barrier: 22 July 1942–1 May 1944 (Boston: Little, Brown and Company, 1950), 307.
3 Hone, Trent. “Guadalcanal Proved Experimentation Works”, Naval History, December 2017, Volume 31, Number 6, 30–37. On 25 November 1943, Arleigh Burke’s “Little Beavers,” DesRon 23, would do likewise with success against the Japanese at Cape St. George.
4 Morison, Breaking the Bismarcks Barrier, 322.
For Further Reading
Dull, Paul S. A Battle History of the Imperial Japanese Navy (1941–1945). (Annapolis, MD: Naval Institute Press, 1978).
Gailey, Harry A. Bougainville, 1943–1945: The Forgotten Campaign. (Lexington: University Press of Kentucky, 1991).
Hone, Trent. “Guadalcanal Proved Experimentation Works”, Naval History, December 2017, Volume 31, Number 6, pp. 30–37.
———. “Learning to Win: The Evolution of U.S. Navy Tactical Doctrine during the Guadalcanal Campaign,” Journal of Military History, July 2018, Volume 82, Number 3, pp. 817–41.
———. Learning War: The Evolution of Fighting Doctrine in the U.S. Navy, 1898–1945. (Annapolis, MD: Naval Institute Press, 2018).
Jones, Ken. Destroyer Squadron 23: Combat Exploits of Arleigh Burke’s Gallant Force. (Annapolis: MD: Naval Institute Press, 1997).
Marsh, Robert M. "Tactics Rule at Empress Augusta Bay". Naval History, December 2003, Volume 17, Number 6, pp. 42–47
McGee, William L. The Solomons Campaigns, 1942–1943: From Guadalcanal to Bougainville, Pacific War Turning Point (Amphibious Operations in the South Pacific in WWII). (Tiburon, CA: BMC Publications, 2000).
Morison, Samuel E. Eliot, History of United States Naval Operations in World War II, Vol. VI, Breaking the Bismarcks Barrier: 22 July 1942–1 May 1944 (Boston: Little, Brown and Company, 1950).
O’Hara, Vincent P. The U.S. Navy Against the Axis: Surface Combat, 1941–1945. (Annapolis, MD: Naval Institute Press, 2007).
Potter, Edward. B. Admiral Arleigh Burke. (Annapolis, MD: Naval Institute Press, 2005).
Roscoe, Theodore. United States Destroyer Operations in World War II. (Annapolis, MD: Naval Institute Press, 1953).
Wolters, Timothy S. Information at Sea: Shipboard Command and Control in the U.S. Navy from Mobile Bay to Okinawa, (Baltimore, MD: Johns Hopkins University Press, 2013).
