Chicago II (CL-29)
1931–1943
The second U.S. Navy ship named for a city in Illinois.
II
(CL-29: displacement 9,300; length 600'3"; beam 66'1"; draft 16'8"; speed 32.5 knots; complement 621; armament 9 8-inch, 4 5-inch, 6 21-inch torpedo tubes; class Northampton)
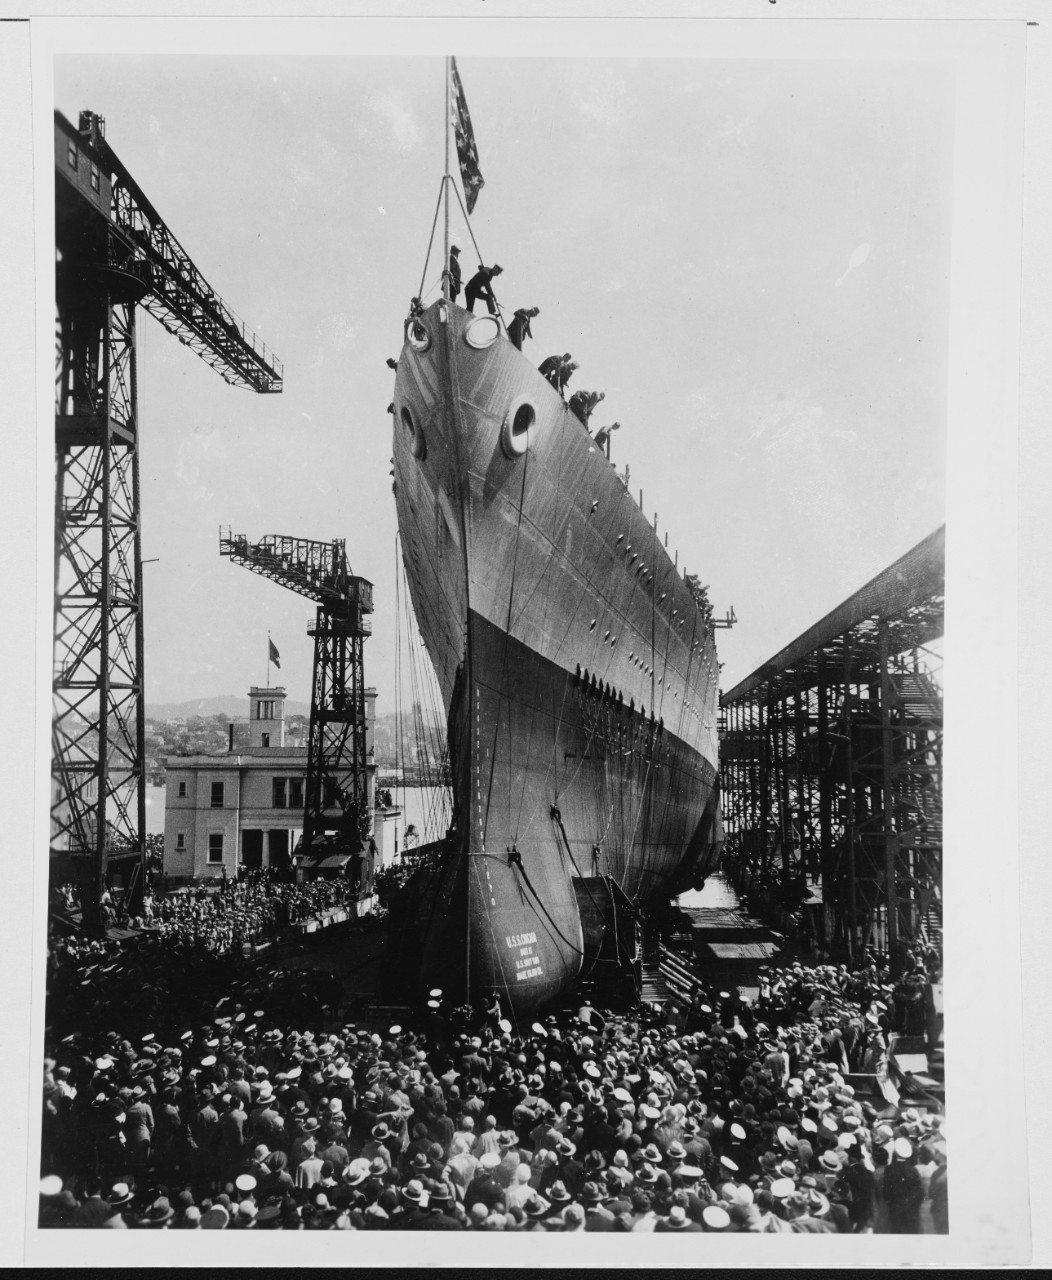
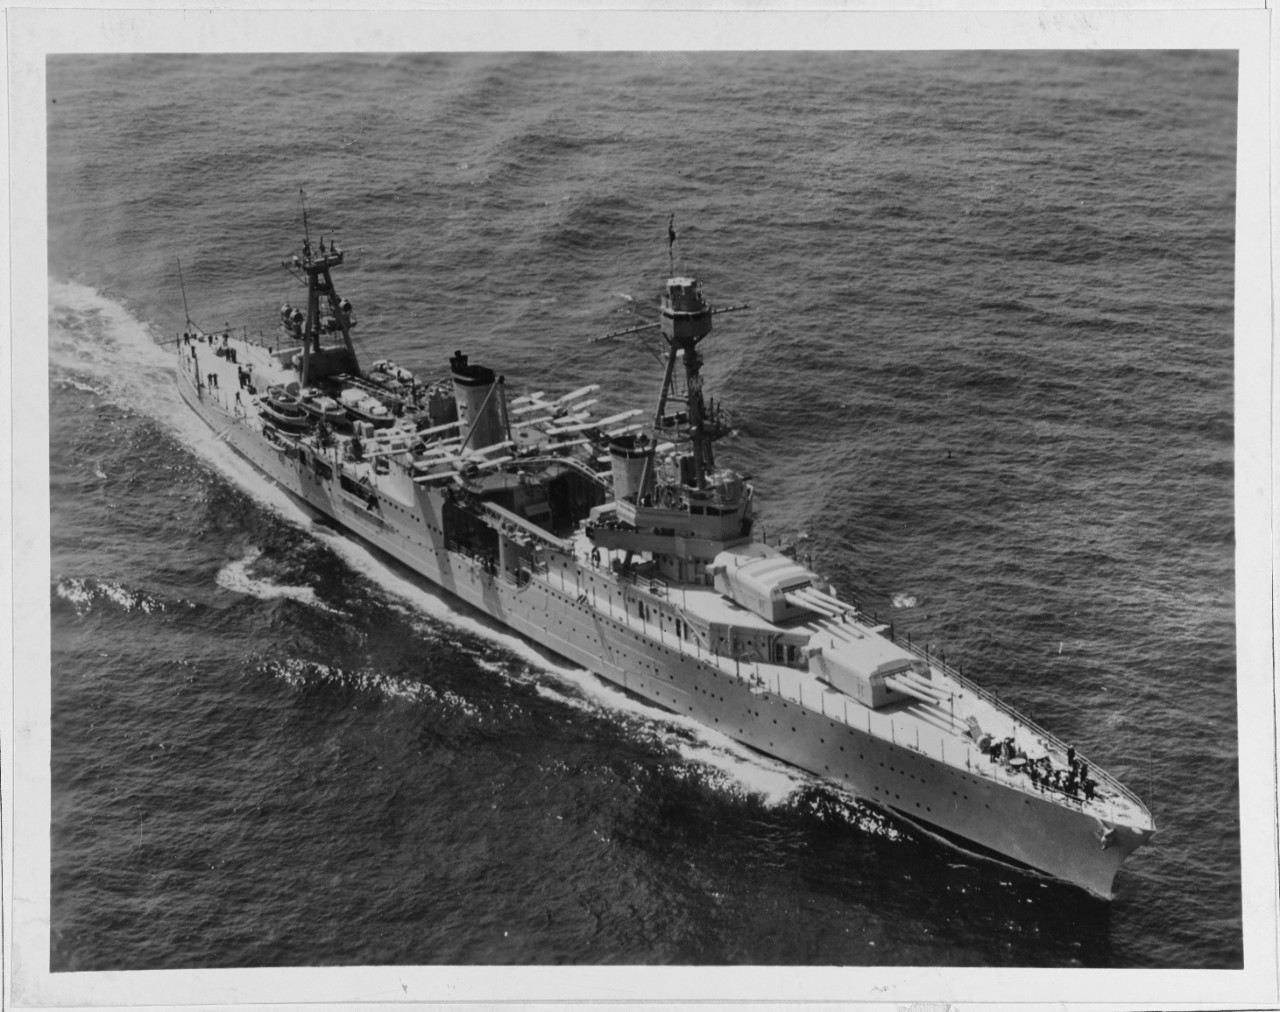
The second Chicago (CL-29) was laid down on 10 September 1928 at Vallejo, Calif., by Mare Island Navy Yard; launched on 10 April 1930; sponsored by Miss. Elizabeth Britten, sister of Representative Frederick A. Britten of Illinois, Chairman of the House Committee on Naval Affairs; and commissioned on 9 March 1931, Capt. Manley H. Simons in command.
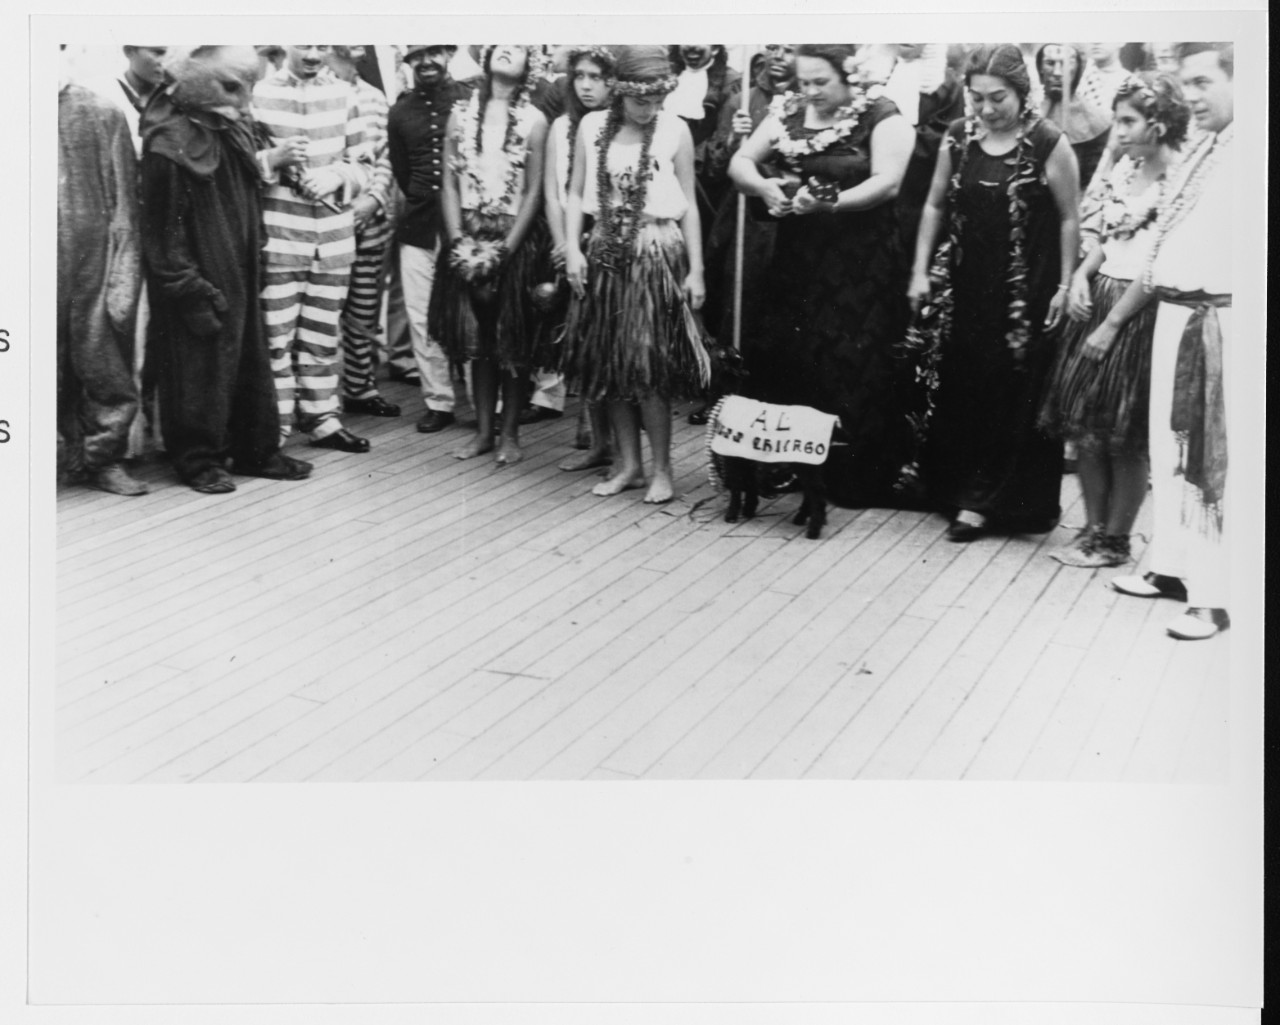
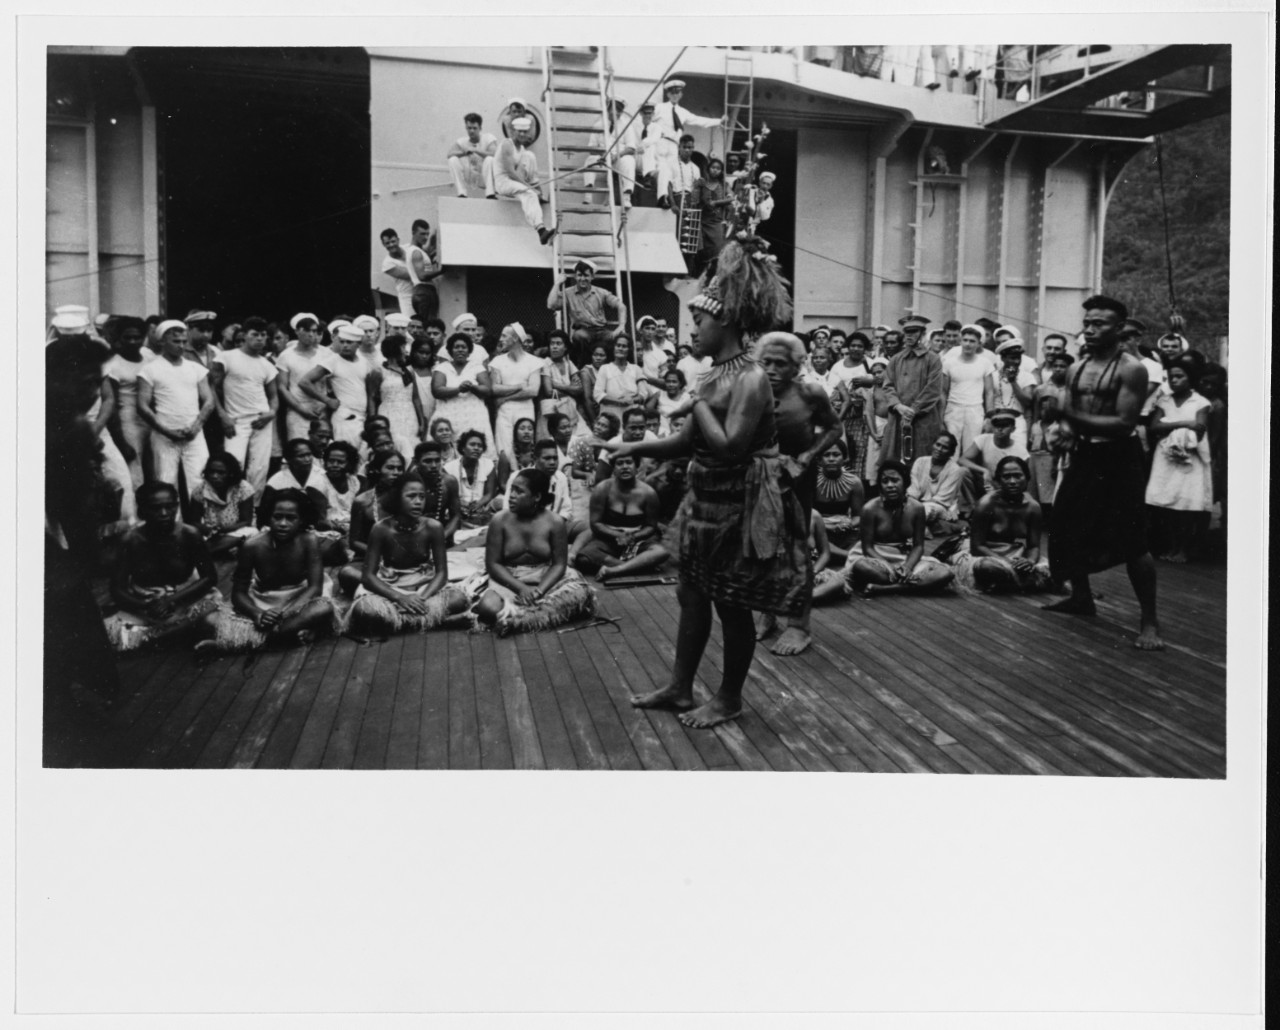
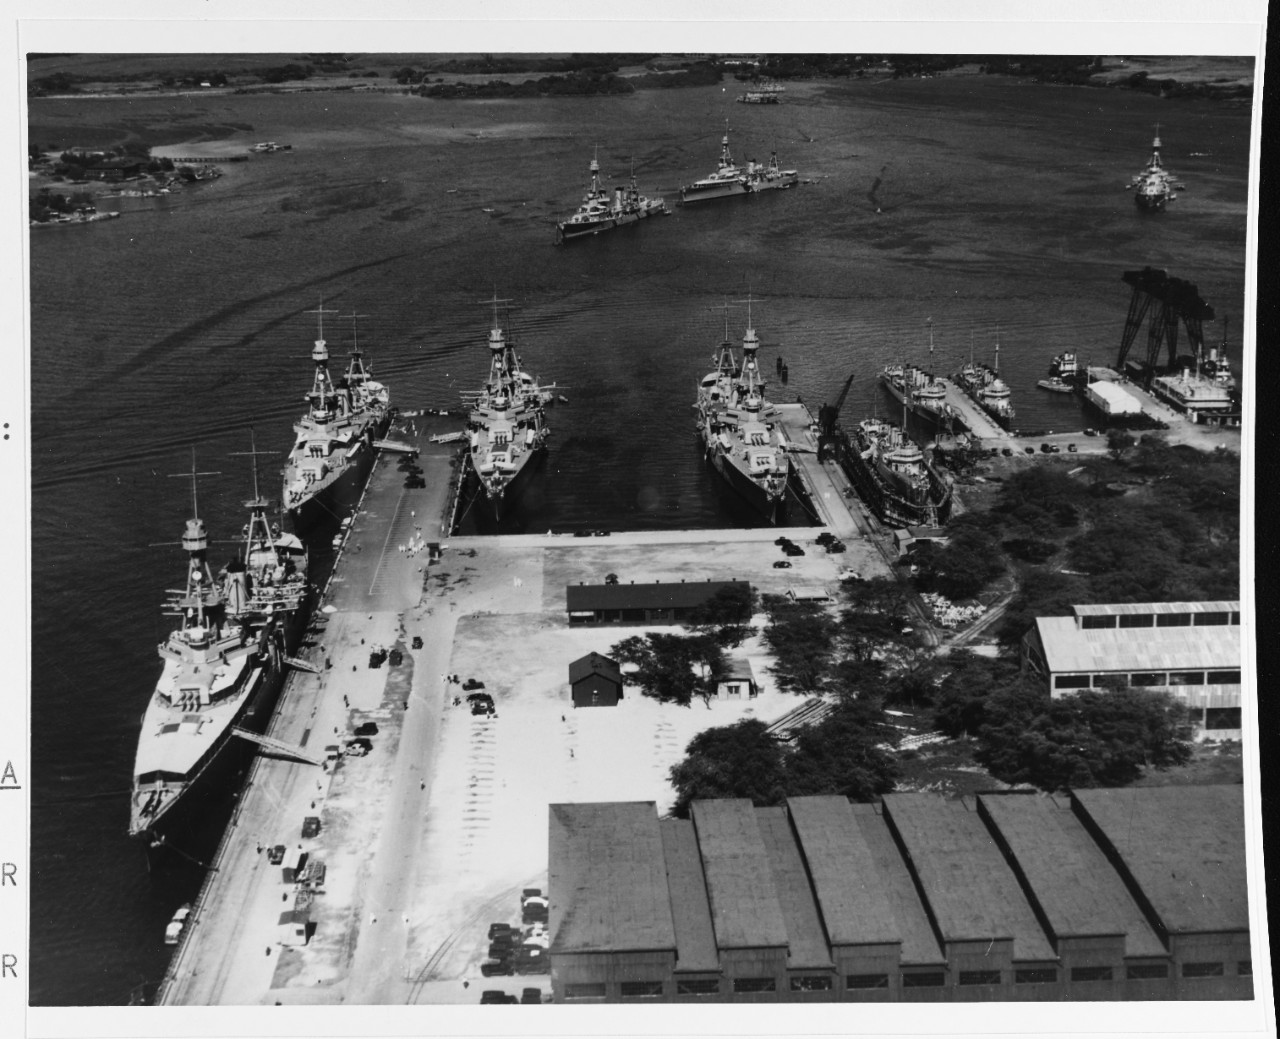
In accordance with the provisions of the Treaty for the Limitation and Reduction of Naval Armament (London Naval Treaty) of 27 October 1930, particularly the terms concerning her main battery of 8-inch guns, Chicago was reclassified to a heavy cruiser (CA-29) on 1 July 1931. Chicago carried out her shakedown cruise to Honolulu, T.H., Tahiti in the Society Islands, and American Samoa. The ship completed some voyage repairs at Mare Island Navy Yard, and then (27 July–15 August 1931) set out for the east coast and put in to Fort Pond Bay off Long Island, N.Y. There, she became the flagship of Commander Cruisers, Scouting Force, and operated with that force until 1940.
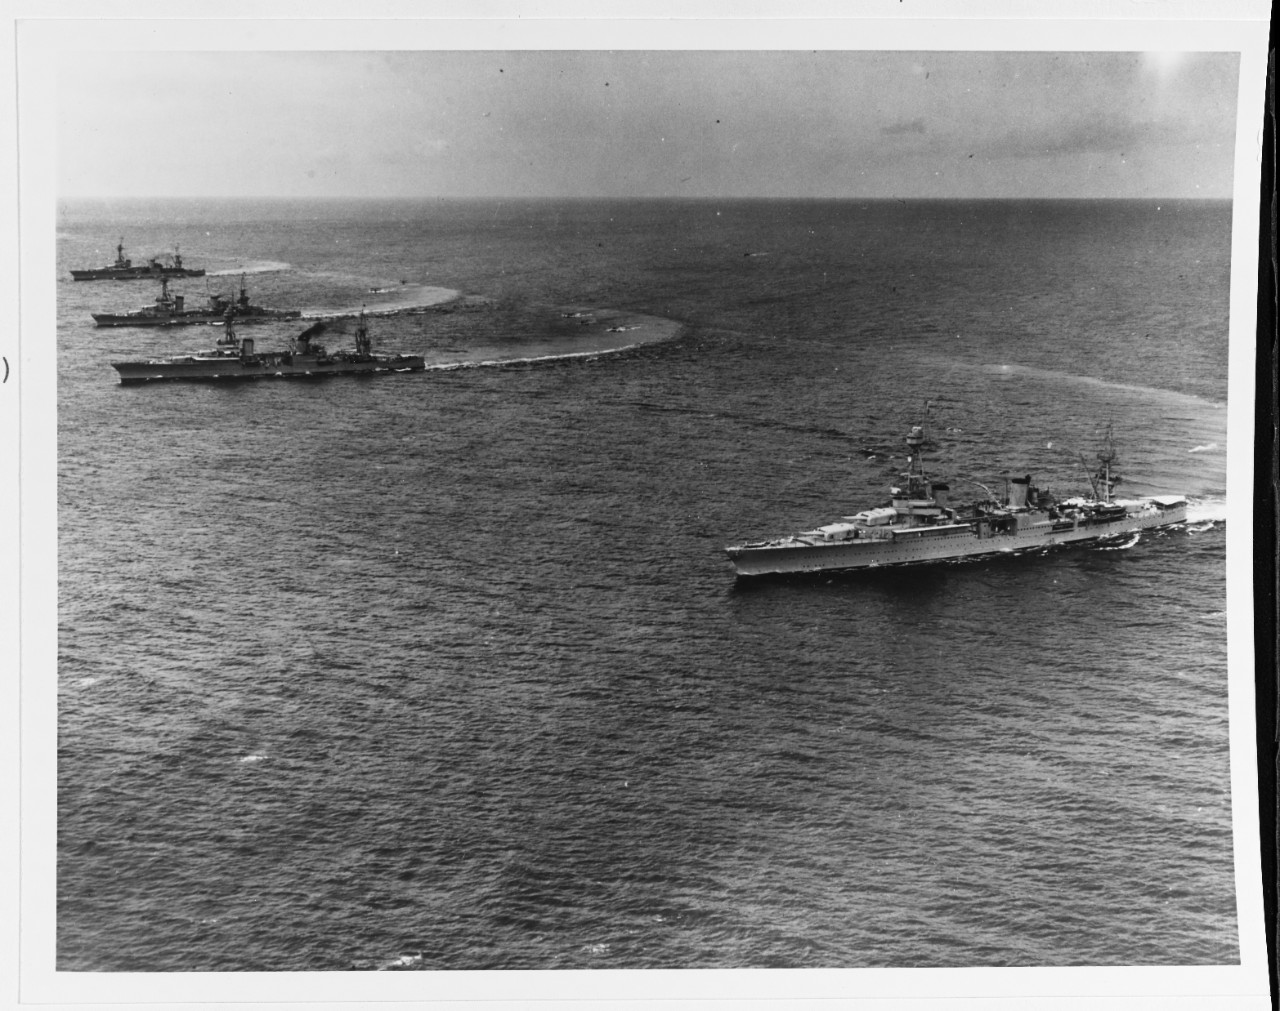
The ship sometimes shifted temporarily between coasts for exercises, such as the annual fleet problems, which concentrated the Navy’s power to conduct maneuvers on the largest scale and under the most realistic conditions attainable. Chicago worked with other ships of the Scouting Force during gunnery exercises in February 1932, preliminary to the problem off the California coast. Planners envisioned Fleet Problem XIII (7–18 March) off the West Coast as the first step in an overseas campaign in which an advanced force made an initial move from a concentration point to a first objective. Aircraft carriers Langley (CV-1), Lexington (CV-2), and Saratoga (CV-3) took part in the problem that included scouting and tracking, attacking -- and defending -- a convoy, and attrition attacks by aircraft, light vessels, and submarines. Repairs delayed rigid airship Akron (ZRS-4) from participating. Planes from ‘Blue’ carrier Saratoga and Pearl Harbor bombed ‘Black’ submarine Narwhal (SS-167) and rendered her out of action on 10 March, which forced the command of that submarine division to pass to mine laying submarine Argonaut (SM-1). Blue aircraft subsequently sank Barracuda (SS-163) and Bonita (SS-165). Observers called for increased antiaircraft measures against dive bombers to include installing .50 caliber machine guns on board ships. Evaluators also recommended the addition of six to eight carriers in order to project forces overseas, and noted the vulnerability of submarines to aerial attack, and that battleship and cruiser planes needed better flotation gear.
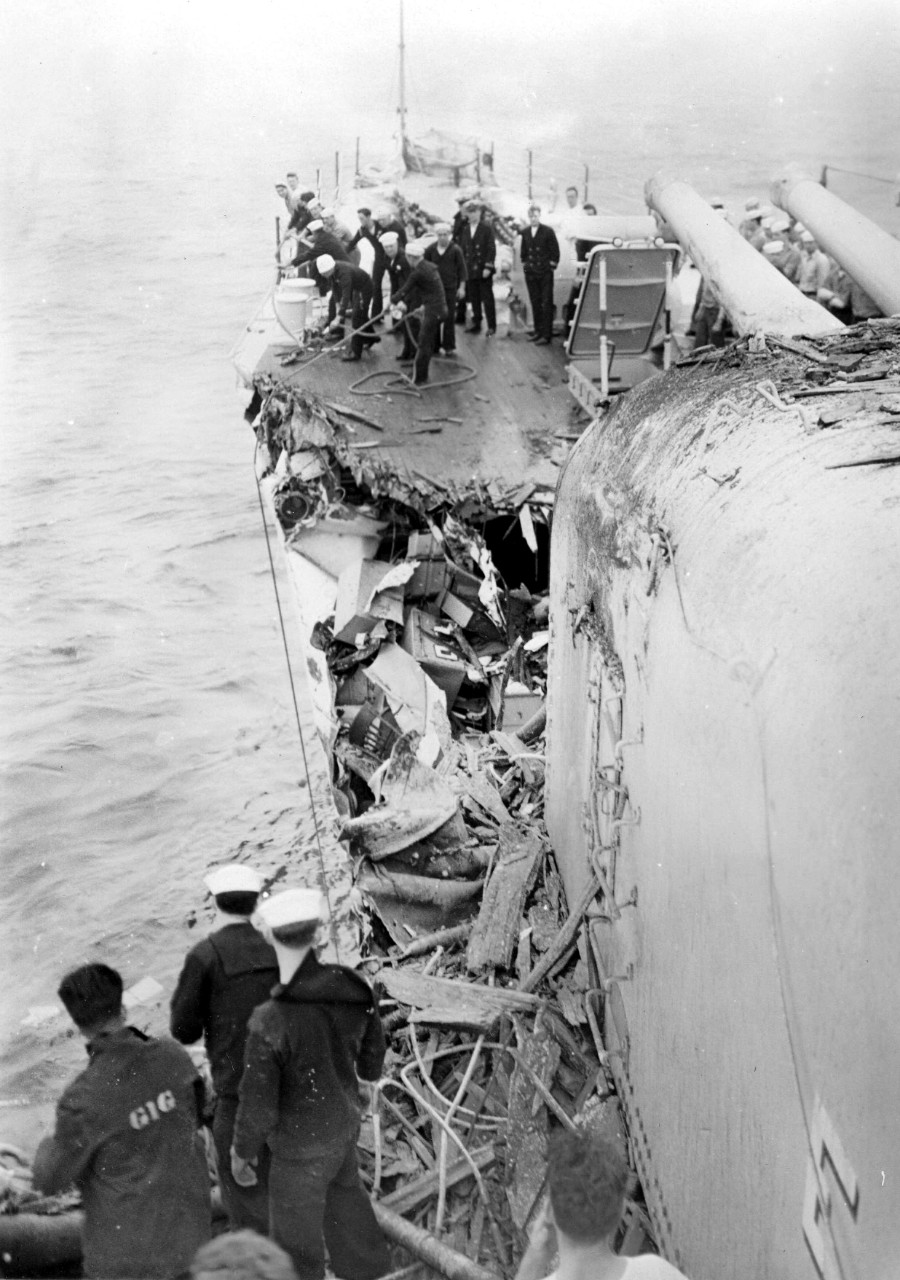
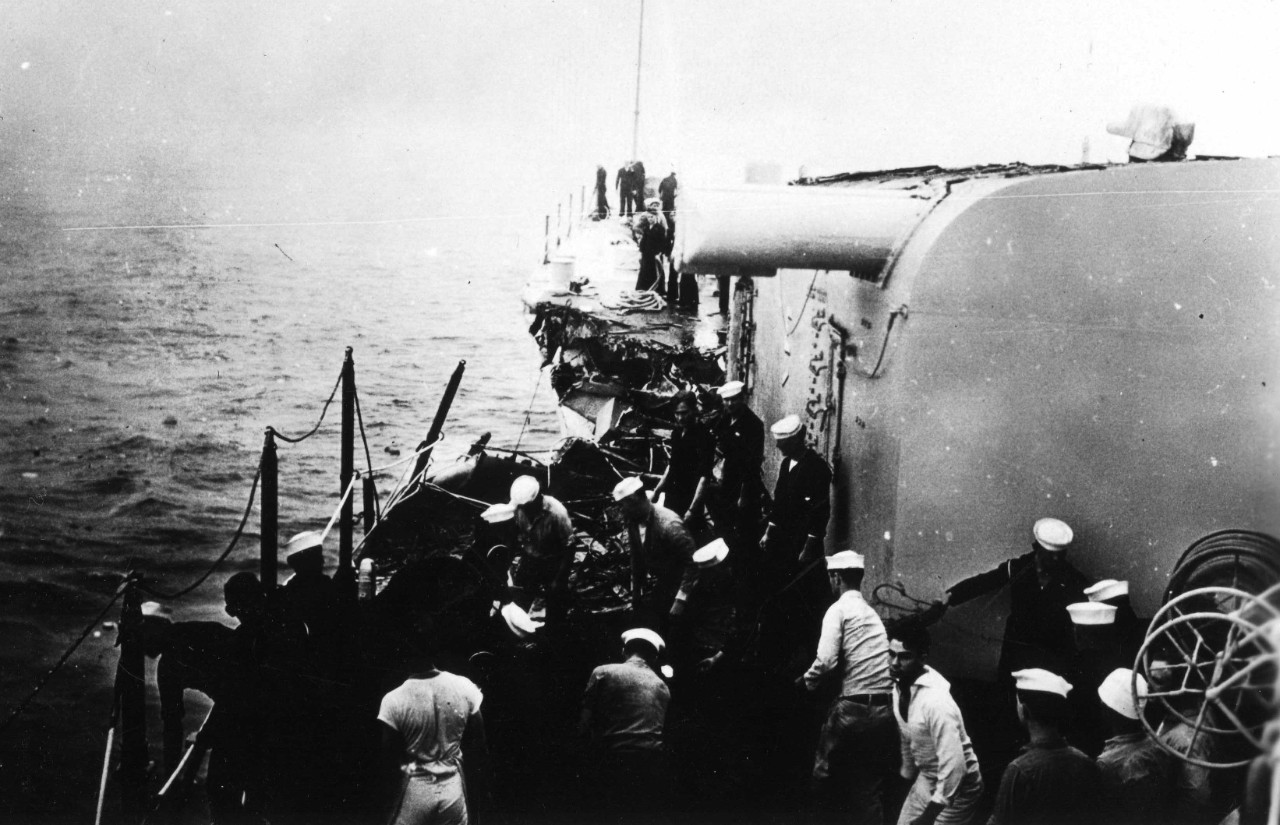
Chicago collided with 6,373 ton British cargo ship Silverpalm, Capt. B. T. Cox, master, in a dense fog that shrouded the California coast off Point Sur on 24 October 1933. At least one other merchantman steamed nearby, which Capt. Herbert E. Kays, Chicago’s commanding officer, referred to as a “mystery ship.” Silverpalm sounded her whistle, watchstanders on board the cruiser heard the blast, and Capt. Kays ordered Chicago to stop. The fog lifted momentarily, and “there she [the mystery ship] was,” Kays recalled, “800 or 900 yards off our starboard going in a direction that would cross our bows…I ordered the Chicago to go ahead, and then almost immediately there came another ship [Silverpalm] out of the fog on our port bow, close ahead and headed directly for the Chicago. I signaled for emergency full speed astern, tooted the whistle, but the approaching vessel crashed into the port bow just forward of [Turret I] which stopped her cutting off our bow.”
![Silverpalm, her bow crushed, lies-to following the collision on 24 October 1933. Ultimately, on the night of 12 June 1941, Silverpalm, en route from Calcutta [Kolkata], India, via Freetown, Sierra Leone, to Glasgow, Scotland, is torpedoed by Germ... Silverpalm, her bow crushed, lies-to following the collision on 24 October 1933. Ultimately, on the night of 12 June 1941, Silverpalm, en route from Calcutta [Kolkata], India, via Freetown, Sierra Leone, to Glasgow, Scotland, is torpedoed by Germ...](/content/history/nhhc/research/histories/ship-histories/danfs/c/chicago-ii/_jcr_content/body/media_asset_156938529/image.img.jpg/1498043897490.jpg)
Silverpalm sliced into Chicago forward of Turret I, and her bow thrust nearly 18 feet through nine staterooms. The impact crushed Chief Pay Clerk John W. Troy of Newport, R.I..; sailors used hatchets and torches to hack and cut their way through twisted and crumpled steel and located 1st Lt. Frederick S. Chappelle, USMC (USNA 1920) of Waterloo, N.Y., pulling him from the wreckage. Evacuated to a hospital when the ship put in to San Francisco, where Chappelle died six hours later. Only when Chicago moored at that port did men locate the body of Lt. Harold A. “Mac” MacFarlane (USNA 1929) of Scouting Squadron (VS) 10S, who hailed from Haverhill, Mass., the third victim. Rescuers, meanwhile, found Machinist Joseph A. Oehlers of Camden, N.J., in a devastated passageway. Oehlers survived, but one hand was mashed and one arm fractured so severely that it had to be amputated just below the elbow. Chicago completed extensive repairs at Mare Island Navy Yard.
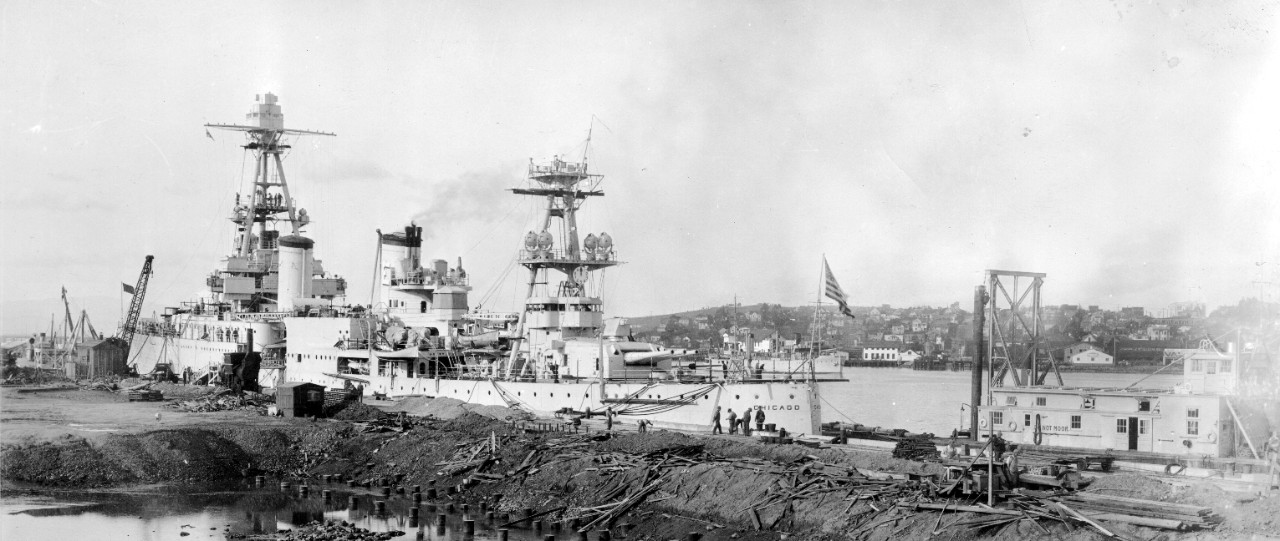
The U.S. Fleet operated on the west coast thereafter and, until 1934, in the Pacific from Alaska to the Panama Canal Zone and the Hawaiian Islands. Chicago served as the flagship of Cruiser Division (CruDiv) 5 with Louisville (CA-28) and Salt Lake City (CA-25) that year, and she normally embarked up to four Vought O2U-4s and O3U-1s of VS-10S, Lt. Cmdr. Thomas L. Sprague in command. Three separate exercises designed to enhance realism comprised Fleet Problem XV in the Caribbean and in Panamanian waters (19 April–12 May 1934). Chicago’s planes coordinated the operations of the other cruisers for fleet aircraft development. Aircraft sank Saratoga and put Lexington out of action. On 6 May six Grumman FF-1s flying from Lexington shot down rigid airship Macon (ZRS-5) — although she transmitted a sighting report of the carrier. Observers noted the liability of airships in fleet operations and counterbalanced their great cost, slow speed, and vulnerability unfavorably with their value as scouts. The increase of the fleet problems in complexity and duration led umpires to initiate periodic recesses to rest crews. The lessons learned included the advancement of the idea of small carriers to solve recovery concerns, the inefficiency of battleship and cruiser plane handling, the necessity for carrier airplanes capable of carrying 500 and 1,000 pound bombs, and the requirement of improved aircraft tenders to replace the slow and poorly equipped ships in service. Following the conclusion of the annual fleet exercises, President Franklin D. Roosevelt reviewed the fleet in New York Harbor. The Scouting Force operated along the east coast and the Caribbean in the waters off Cuba and Haiti until October 1934, and then returned to San Pedro, Calif.
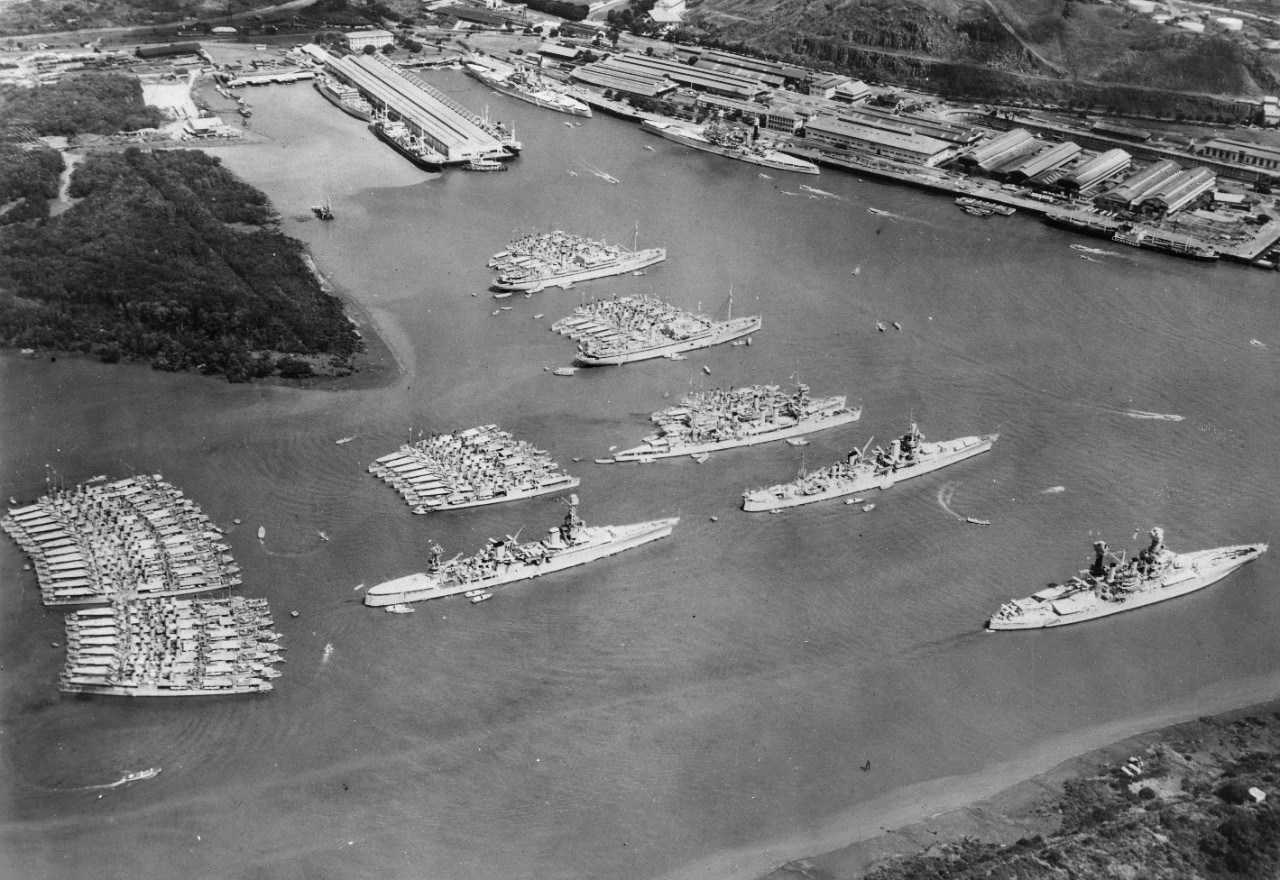
The five phases of Fleet Problem XVI covered a vast area of nearly five million square miles from the Aleutian Islands to Midway Island, the Hawaiian Islands, and the eastern Pacific (29 April–10 June 1935). The Black power, representing the Japanese, seized some of the Aleutians and then Midway, from which they threatened to cut the U.S. maritime lifelines along the west coast and across the eastern Pacific. The White power, representing the Americans, sought to contain and roll back the Black onslaught. Ironically, the Japanese also announced that they intended to carry out maneuvers in Japanese waters and off the Kuril Islands, and some American officials feared that the Japanese and U.S. fleets might accidently clash, triggering a war. Secretary of the Navy Claude A. Swanson replied to these accusations by noting that the U.S. forces would operate east of the International Date Line, and therefore safely beyond the range of a likely confrontation with the Japanese, and that the latter revealed that they were not to begin their training until after the U.S. problem. Some American ships operated west of 180° but remained in U.S. territorial waters and did not cross the line. In addition, severe weather hampered the operations in Alaskan waters.
Chicago operated with the White fleet, which comprised 12 battleships, four carriers -- during her first fleet problem. Ranger (CV-4) joined Langley, Lexington, and Saratoga in the Main Body of the White fleet -- 13 heavy cruisers; eight light cruisers; 59 destroyers; four destroyer minelayers; 23 submarines; and more than 20 transports and auxiliaries, which carried a mostly theoretical marine landing force. The fleet operated in four task forces. Vice Adm. Arthur J. Hepburn, Commander Scouting Force, U.S. Fleet, led a pair of battleships and their cruiser and destroyer screen to Puget Sound, Wash., and then on toward Alaska. Rear Adm. Thomas C. Hart, Commander CruDiv 5, deployed Lexington, Chicago, Louisville, and Salt Lake City, and some destroyers, to screen target ship Utah (AG-16) while she carried about 700 marines that were to recapture Midway — the strategic atoll actually consists of two principal islands, Eastern and Sand, together with sand islets. Adm. Joseph M. Reeves, Commander-in-Chief, U.S. Fleet, led the main body from San Diego and San Pedro, Calif. Finally, Rear Adm. Wat T. Cluverius, Commander Base Force, U.S. Fleet, followed the fleet to Hawaiian waters in command of Langley and a mix of destroyers and auxiliaries. Rear Adm. Cyrus W. Cole, Commander Submarine Force, U.S. Fleet, led the Black fleet, which eventually counted 31 submarines.
Cole dispatched nine submarines to attack the White ships as they steamed westward. The slowness of sending patrols on 30 April 1935, enabled Black submarine Bonita to close within 500 yards and fire six torpedoes at Ranger as she recovered planes, and for Barracuda to fire four torpedoes from 1,900 yards. Planes pursued the submarines and a bomber caught Bonita on the surface and made a pass before she submerged, but the ease with which the boats penetrated the screen boded poorly for the ships. The White ships persevered and advanced into Hawaiian waters, and aircraft flying from Lexington covered the marines while Chicago, Louisville, and Salt Lake City shelled undefended Midway, and the Leathernecks landed and seized the atoll.
Phase III followed, the fleets reorganized and Hart and his cruisers -- including Chicago -- shifted to the Black fleet, led by Hepburn, and which thus consisted of: battleships New York (BB-34) and Oklahoma (BB-37), that each stood for a division of three battleships; Lexington, which embarked 74 airplanes; Indianapolis, which portrayed a trio of battlecruisers; a half dozen additional heavy cruisers that operated as such; four light cruisers, 25 destroyers; four destroyer minelayers; 19 submarines; 42 battleship and cruiser spotter planes; and 45 flying boats that patrolled from Midway. Adm. Harris Laning, Commander Battle Force, took the White forces to sea, which counted: ten battleships; Saratoga, Ranger, and Langley; three heavy cruisers; a trio of light cruisers; 28 destroyers; a half dozen submarines; and marines of the Fleet Marine Force; as well as some support from the Army’s Hawaiian Detachment. White deployed 173 carrier planes and 62 aircraft from battleships and cruisers, and thus counted a clear-cut advantage in the air against Black, though the latter operated more submarines. The third phase focused on whether aircraft and submarines could fight a powerful battle fleet.
“On the face of it,” Laning recalled, “the problem for the battle force was not encouraging to contemplate. It seemed hardly possible the enemy could fail to locate us and deliver attacks incessantly from the moment we left Hawaii.” Laning sought to overcome the dilemma and sent Hart and Chicago, Louisville, and Salt Lake City on a bold raid against Midway. Hart battled heavy seas for a couple of days and then approached to within 100 miles of the island by dusk on 17 May. Black planes detected the ships and alerted the garrison, but the defenders’ vigilance lapsed. A full moon shone on the cruisers as they each launched four O3U-1s of VS-10S just after midnight and then made for the island at high speed. The Voughts attacked in two waves of six observation biplanes each at 0150, and strafed and destroyed 12 of the Black flying boats anchored in the lagoon, and damaged a dozen more. The attackers returned to the cruisers, which then came about to the eastward and opened the range from Midway.
Laning meanwhile reinforced Hart with Ranger, a pair of heavy cruisers, and a light cruiser, and Hart used that combined force during the next several days to divert enemy attention from the main body, but not without consequences. Ranger launched scout planes on daily patrols and during the morning watch on 20 May, one of them detected a Black submarine shadowing Chicago to eastward of the cruiser as the task force steamed on a southeasterly course. Four planes discovered and bombed S-30 (SS-135) at 0615, and at 0748 ten more struck her again. The umpires ruled that the aircraft sank the submarine, but her sister boat, S-31 (SS-136), slipped past the screen and sank Chester and damaged Portland (CA-33). Ranger and her consorts then turned southward toward the main body and repeatedly changed courses and speeds to disrupt additional submarines from developing firing solutions. The opposing fleets continued the struggle during the following two phases, by the end of which, in spite of Hart’s success, the umpires ruled the battle a Black victory.
The rival carriers never actually attacked each other during the battle, and in addition, Lexington steamed at high speeds for nearly five days in a row at one point and ran low on fuel, prompting Navy planners to further recommend refining underway replenishment procedures. Patrol and marine aircraft took the major aerial role during the landing exercises when combined forces launched a strategic offensive against the enemy. Furthermore, the aging S class submarines experienced problems and submariners continued to press for newer and larger fleet boats. Chicago had new range finders installed during an overhaul at Mare Island the following year.
Chicago also participated in introducing radar to the fleet. Adm. William D. Leahy, Chief of Naval Operations (CNO), held a policy conference on 1 May 1939 to reach decisions concerning the manufacture and installation of radar equipment. Based upon reports, Leahy and the attendees recommended procuring 20 copies of the experimental XAF radar. The Bureau of Engineering demurred because researchers sought to further improve the system, so the planners compromised and the Navy contracted for ten sets. The service disclosed details of the XAF to engineers at Western Electric Co. Laboratories on 18 May, and the following day to engineers at Radio Corp. of America (RCA). Officers and engineers presented the complete specifications for what they called “radio range equipment” for the prospective bids by the two companies prior to 15 June, but in lieu of contracting for the initial 20 sets, the bureau decided to purchase only six and contracted for them with RCA in October 1939, with the understanding that the Naval Research Laboratory would assist. The XAF was delivered to the contractor the following month, and, designated CXAM-1, delivered to the fleet and fitted in California (BB-44), Yorktown (CV-5), and Chicago, Northampton (CA-26), and Pensacola (CA-24) (May–August 1940). Despite insufficient funding, those researchers succeeded in developing a detection system that eventually revolutionized naval warfare.
Fleet Problem XXI (April–May 1940) consisted of two separate phases around the Hawaiian Islands and eastern Pacific, and involved coordinating commands, protecting a convoy, and seizing advanced bases to bring about a decisive engagement. The lessons learned included: the ability of carriers to alter the caliber of their aircraft weapons by changing squadrons; the tendency of commanders to overlook carriers’ limitations and assign them excessive tasks; the necessity for reliefs for flight and carrier crews under actual war conditions; the success of high altitude tracking by patrol aircraft; and the lack of success of low level horizontal bombing attacks. Following her participation in the problem, Chicago completed an overhaul on the west coast, and continued to operate out of San Pedro until 29 September 1940, when she sailed to Pearl Harbor.
During the next 14 months the heavy cruiser operated primarily out of Pearl Harbor, with additional cruises to the west coast, exercising with various task forces to develop tactics and cruising formations. The global crisis compelled the service to cancel Fleet Problem XXII, originally scheduled for January 1941. “In view of the international situation,” Adm. Harold R. Stark, CNO, wrote to Gen. George C. Marshall Jr., USA, the Army’s Chief of Staff, on 3 December 1940, “plans for Fleet Problem XXII have been cancelled.” President Roosevelt’s attendance had attracted considerable notoriety to the exercises; loose lips talked, and the front page of the New York Times New Year’s edition announced: “ALL NAVY GAMES OFF FOR THIS YEAR.” “SHIPS IN FIGHTING TRIM”, the newspaper further observed, but elaborated that the fleet was to be held in “Hawaiian waters, and, according to good information, will remain there until the existing international situation is definitely improved.”
Capt. Bernhard H. Bieri Jr., relieved Capt. Marion C. Robertson as Chicago’s commanding officer on 1 February 1941. “I found a good ship, and a good group of officers on board,” Bieri afterward reflected. “I think in the time I had her, we did quite a bit towards improving her efficiency.” As war with the Japanese loomed the United States expanded its naval presence in the Pacific and sought closer ties with prospective allies. Rear Adm. John H. Newton, Commander Cruisers Scouting Force, broke his flag in Chicago in command of a composite squadron that set out from Pearl Harbor with little fanfare or advanced planning on a voyage to the south Pacific on 3 March 1941. “I never could quite figure that [the purpose of the cruise] out,” Bieri observed, “unless they sort of timed it with the adoption of the signing of the Lend-Lease Act. They wanted to let the Australians know that they weren’t being left out on the limb, I suppose.” On 11 March the U.S. Congress passed the Lend-Lease Act; which, in particular, changed the “cash and carry” provisions of the Neutrality Act of 1939 to permit the transfer of munitions to the Allies.
Chicago sailed in company with Portland, light cruisers Brooklyn (CL-40) and Savannah (CL-42), and the ships of Destroyer Division 5: Case (DD-370), Cassin (DD-372), Clark (DD-361), Conyngham (DD-371), Cummings (DD-365), Downes (DD-375), Reid (DD-369), Shaw (DD-373), and Tucker (DD-374), and oiler Sangamon (AO-28). The squadron hove to without warning off Pago Pago, Samoa, and surprised Capt. Laurence Wild, the island’s commandant, when the ships visited that American enclave (9–12 March). Task Group (TG) 9.2, consisting of Brooklyn and Savannah, and Case, Cummings, Shaw, and Tucker then (17–20 March) visited Auckland, New Zealand, and from there put in to Tahiti (25–27 March), before returning to Pearl Harbor.
Chicago, Portland, Cassin, Clark, Conyngham, Downes, and Reid meanwhile continued separately into the southern latitudes. The Australian and U.S. governments only announced the impending arrival of the ships to Australian waters on 19 March, scant hours before Chicago and her consorts slid into Sydney for a goodwill visit for three days (20–23 March). The ships arrived at what proved to be an auspicious time following the announcement of the Lend-Lease Act, and amidst an outpouring of welcome. The Australian parliament adjourned early so that members could rush by a special train from Canberra to Sydney to greet the Americans, and the Sydney Morning Herald predicted that hundreds of thousands of people would “throng the streets” of the city during the ships’ visit. People purchased U.S. flags, and city officials waived entrance fees to movie theaters and the zoo, and arranged for trains to take visitors to the scenic Blue Mountains. The ships initially landed just over 600 bluejackets and marines, who joined Australian servicemen and paraded through a shower of streamers, confetti, and flower petals past thunderous acclaim from the crowds. A kookaburra, a terrestrial tree kingfisher, flew from The Domain, an area of parks and playing fields, to Chicago’s mast, where a journalist noted that it “gave vent to a burst of hospitable laughter”. The Australians “cherished happiest memories of other visits of the American Navy”, William M. Hughes, an Australian politician who had served as that country’s Minister for the Navy, explained their hospitality.
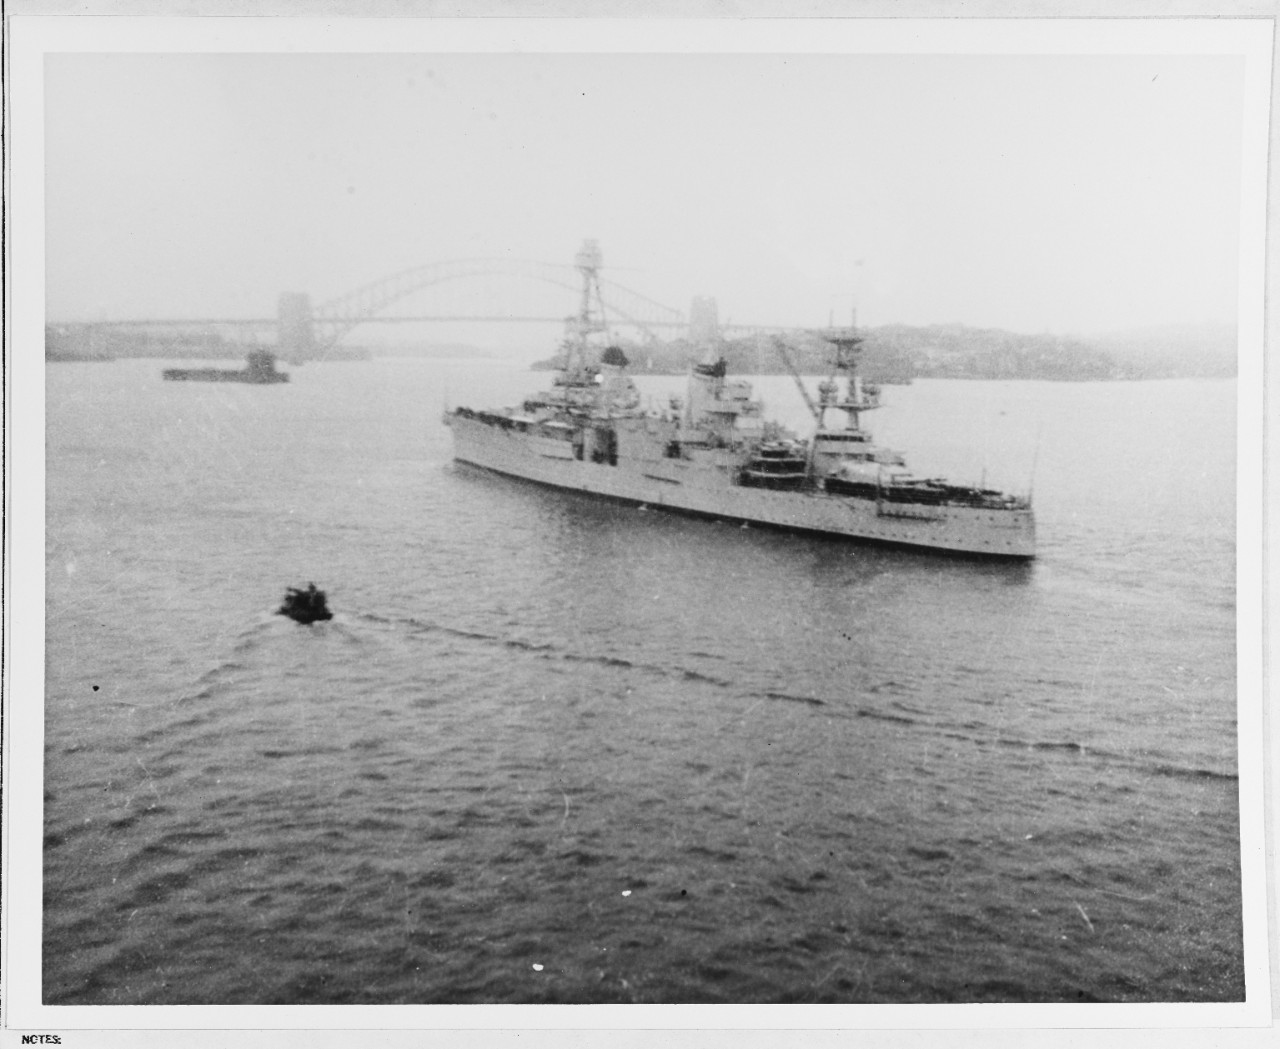
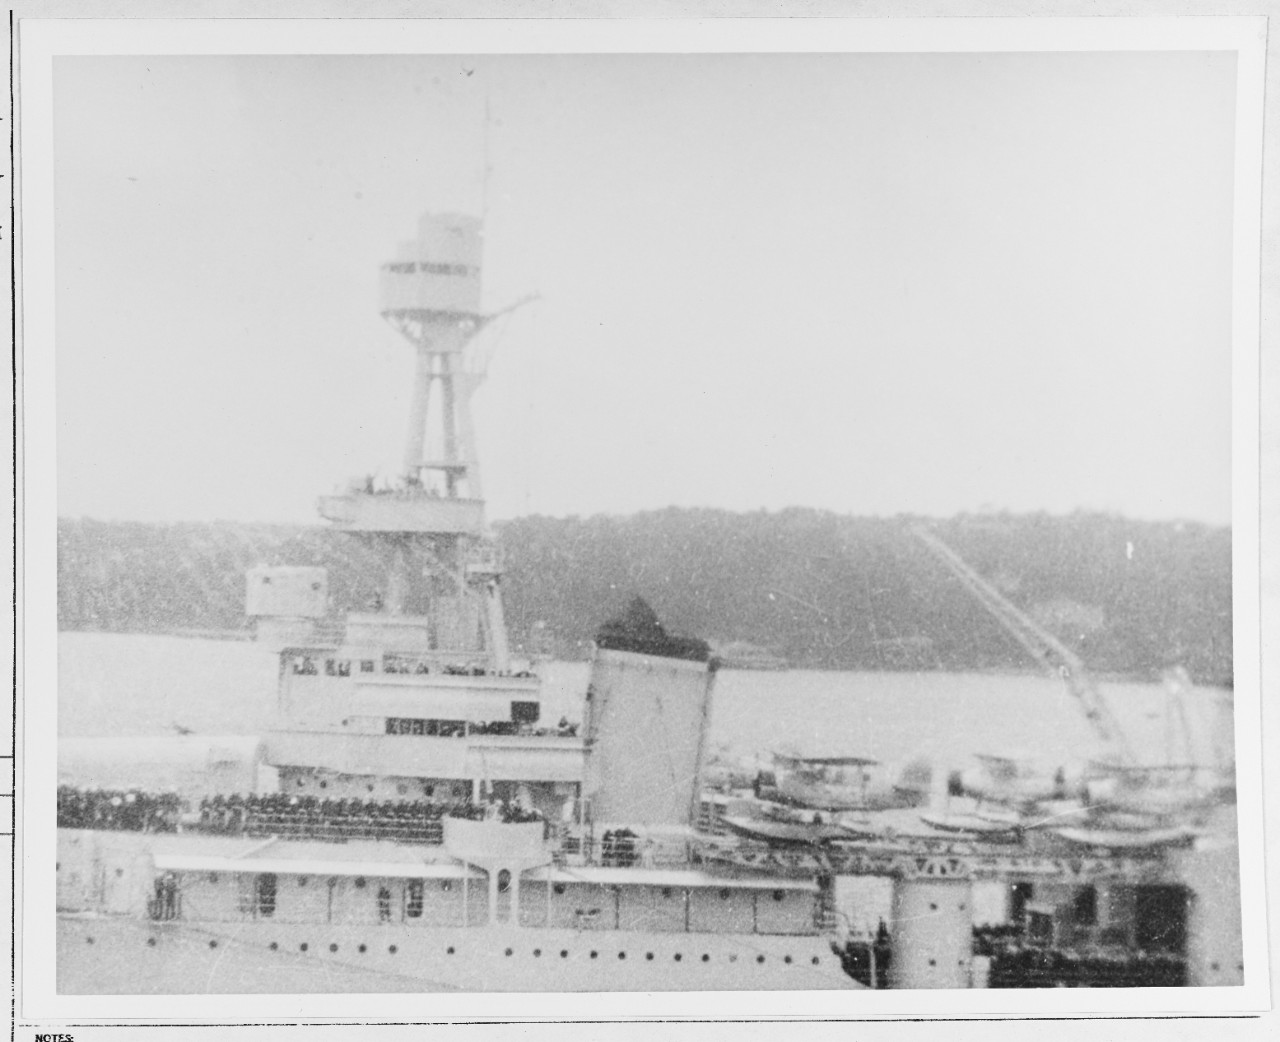
Following their tumultuous welcome at Sydney, the ships stood out of that port, turned their prows northward along Australia’s eastern coast, and visited Brisbane (25–28 March). Nearly a quarter of a million people greeted the ships and police could not hold back the eager crowds. The city fathers thoughtfully reserved 800 seats at a concert at Town Hall for the Americans, but the convivial Australians welcomed the sailors and marines so wholeheartedly that only 50 men from the ships showed up for the performance. Sir Leslie O. Wilson, Governor of Queensland and a colonel in the Royal Marines, inspected Chicago’s marine detachment.
The U.S. visits provided an influx of cash into the local economies, but some of the visitors found the welcome too tempting, and a man jumped ship in Sydney, and five more failed to return to their vessels in Brisbane. Tens of thousands of people crammed into vantage points at Brisbane to watch as the ships returned to sea. “I can recall many historic demonstrations of public enthusiasm by Australians”, Hughes noted, “but the farewell to the U.S. flotilla was the most universally spontaneous and genuine ever given.” The ships set out on northerly and easterly courses, visited Suva in the Fiji Islands (1–3 April), and on 10 April returned to Pearl Harbor. Chicago then resumed her busy schedule, and joined Task Force (TF) 3.2 and screened Enterprise (CV-6) during a tactical training exercise near Johnston Island in April. The cruiser continued to train primarily in Hawaiian waters, and ventured to the west coast with TF 19 during a three week cruise in October.
The Japanese Dai-ichi Kidō Butai (the 1st Mobile Striking Force), Vice Adm. Nagumo Chūichi in command, attacked Oahu on 7 December 1941, and although the damage to the battle line proved extensive, Enterprise, Lexington, and Saratoga providentially escaped, the former two ships having been deployed at the eleventh hour to reinforce Wake Island and Midway Island. Enterprise returned to Pearl Harbor on 17 December, but after the devastating Japanese attack Pacific Fleet planners strenuously attempted to ensure that only a single carrier entered Pearl Harbor at a time. Enterprise and TF 8 therefore returned to sea on 19 December, and proceeded to the waters west of Johnston Island and south of Midway to cover that area. Saratoga had completed an overhaul and just reached San Diego, but subsequently set out for Pearl Harbor.
Rear Adm. Newton again broke his flag in Chicago in command of TF 12, including Lexington. The vessels steamed 425 miles southeast of Midway Island to deliver 18 Vought SB2U-3 Vindicators from Marine Scout Bombing Squadron (VMSB) 231 to that island when they learned of the Japanese attack. Newton climbed a ladder to Chicago’s bridge waving a radio message and saying, “This is it!” Lt. James S. Brown, USNR, one of the cruiser’s damage control officers, stood nearby and vividly recalled, “We all knew what the words, ‘this is it,’ meant.” Nagumo brought his carriers about following the raid and sailed from Hawaiian waters, but many Americans feared that the Japanese carriers might still be operating nearby. Limited information appeared to indicate that the enemy might raid Johnston Island, so Lexington came about with the Vindicators still on board and steamed southeastward toward the island. The carrier launched Brewster F2A-3 Buffaloes of Fighting Squadron (VF) 2 for a dawn combat air patrol (CAP) over the warships, and Douglas SBD-3 Dauntlesses of VS-2 that vainly searched 315 miles for the enemy fleet. At one point that tragic day, Lexington made to the south toward a planned rendezvous with Enterprise about 120 miles west of Kauai, but late in the afternoon joined TF 3, Vice Adm. Wilson Brown Jr., who broke his flag in Indianapolis, and assumed command of the two forces, which effectively operated as an expanded TF 12.
The task force spent the next day scouring the area for the Japanese and launching search planes and CAP fighters. Just after noon Portland (CA-33) and Porter (DD-356) dropped back to search for an airplane reported overdue. Chicago’s CXAM-1 radar triggered chaos when, abruptly at 1540 on 8 December, it detected a number of unidentified aircraft bearing 245°, range 44 miles. The planes flew toward the ships, and ten minutes later Chicago signaled Lexington: “Many bandits, bearing 255° (T.), distance 30 miles, closing.” The carrier sounded general quarters, and began arming her available Dauntlesses for a strike mission, believing that enemy carriers operated in the area and had launched a strike. Portland broke in over the radio and claimed that she was under attack by enemy planes, just over the horizon to the north. Then at 1618, a Consolidated PBY-3 of Patrol Squadron (VP) 21, flown by Lt. Cmdr. George T. Mundorff and en route from Johnston Island to Pearl Harbor, radioed that the Catalina had just bombed a Japanese cruiser and destroyer southeast of Johnston. Lexington scrambled ten Buffaloes and then Dauntlesses armed with bombs to seek retribution against the Japanese, and additional fighters to protect Portland and Porter. The Buffaloes quickly reached the area and sighted Mundorff’s Catalina; Portland fired a few rounds ineffectively at the Buffaloes, and the flying boat radioed desperately that they were being attacked by fighters! The comedy of errors ended without losses, and Brown searched southwest of Oahu in the Oahu-Johnston-Palmyra triangle before returning on 13 December to Pearl Harbor. The marines flew their Vindicators ashore and on 21 December took off from the Army’s Hickam Field for Midway.
The marines on Wake Island meanwhile on 11 December repulsed a Japanese landing, and TF 14, Rear Adm. Frank J. Fletcher in command and including Saratoga, sailed from Pearl Harbor on 16 December to relieve the garrison on Wake. Chicago operated as the officer in tactical command, and launched her planes in daily searches while patrolling with TF 11, Vice Adm. Brown (14–27 December 1941). Brown intended to launch a diversionary raid on Jaluit Island, but revised intelligence persuaded Brown to first attack Makin Island in the Gilbert Islands [Kiribati], and then diverted back to Wake to support the relief expedition.
The Allies in the meantime reinforced the strategic chain of island bastions across the south Pacific, and these vulnerable convoys of soldiers and marines required protection. Chicago therefore turned her prow southward from Pearl Harbor early in the New Year on 2 February 1942, and on 16 February the ANZAC Squadron hove into view. A combined task force of Allied ships named -- like the ANZAC Area -- in honor of the Australian and New Zealand Army Corps of World War I fame and commanded by Rear Adm. John G. Crace, RN, the squadron operated while subordinated to Vice Adm. Herbert F. Leary, who led the ANZAC Area until 18 April, when parts of that command fell under Gen. Douglas A. MacArthur, USA, and the Southwest Pacific Area. Crace and his staff braved the heavy swells and crossed over in a small boat to meet Brown and his staff on board Lexington. During the following weeks Chicago operated with a number of Allied ships including: seaplane tender Curtiss (AV-4); Astoria (CA-34) and Louisville; Australian heavy cruiser Australia (D.84); Australian light cruiser Hobart (D.63); New Zealand light cruisers Achilles (70) and Leander (75); and Anderson (DD-411), Farragut (DD-348), Hammann (DD-412), Hughes (DD-410), Perkins (DD-377), Sims (DD-409), and Walke (DD-416).
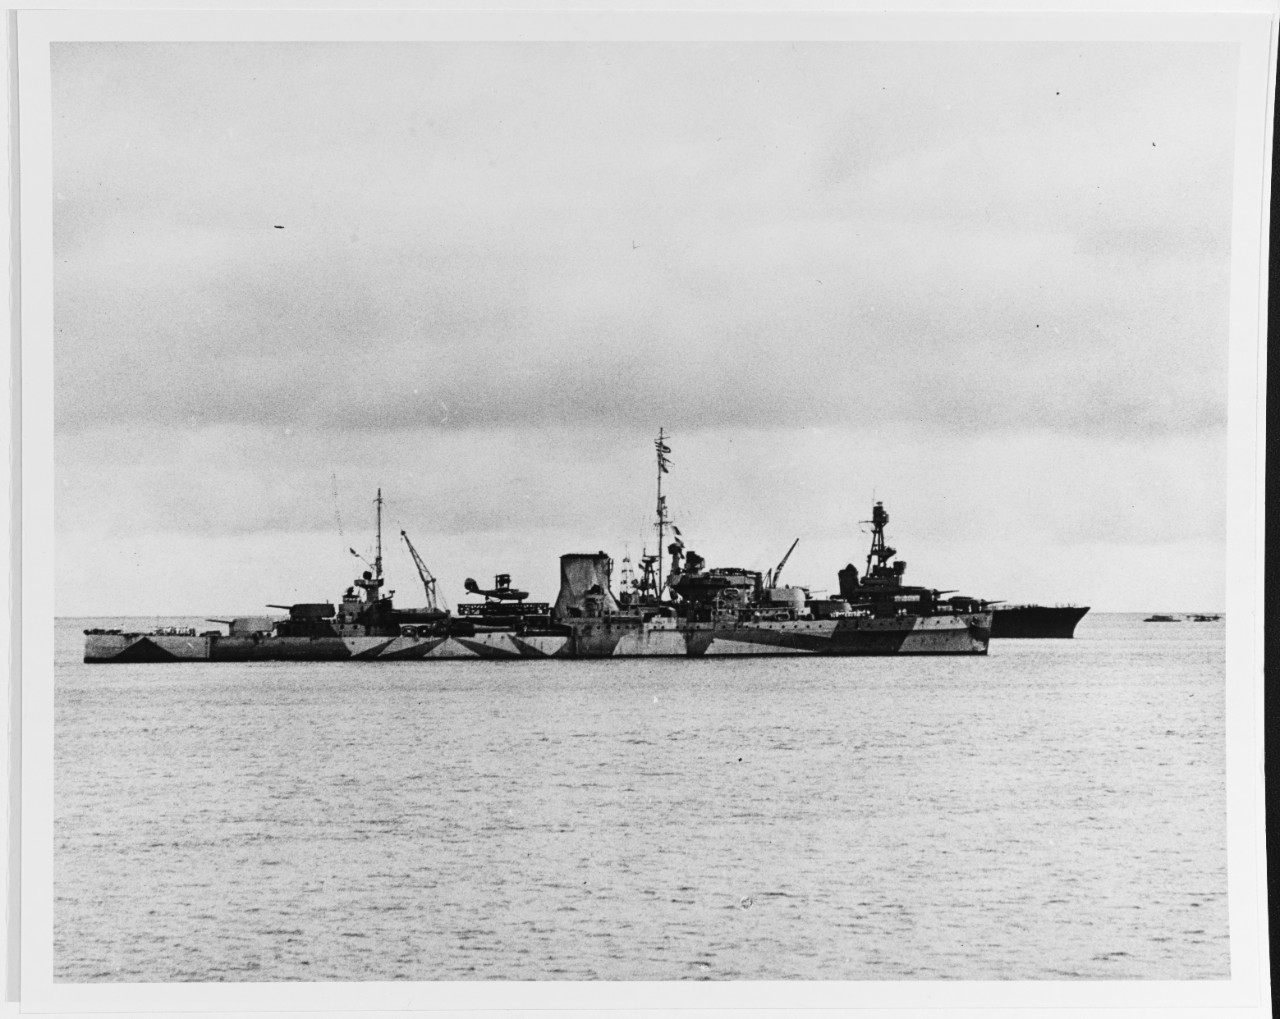
The heavy cruiser operated off the Louisiade Archipelago, but did not have to wait for further action because the Japanese continued their onslaught across the Pacific and invaded New Guinea. Consequently, Chicago carried out two operations nearly simultaneously as she busily helped cover a convoy of reinforcements en route to Nouméa, New Caledonia — and took part in a carrier raid. Convoy BT.200 consisted of troopships Argentina, Cristobal, Island Mail, John Erickson (ex-Kungsholm), J.W. McAndrew (ex-Deltargentino), Santa Elena, Santa Rosa, and Thomas H. Barry (ex-Oriente), which carried 16,766 troops and 113 nurses of Poppy Force, the Army’s TF 6814, from the New York Port of Embarkation on 23 January 1942. Several of the ships had been converted from liners by the simple process of removing nearly all of their appurtenances and installing pipe bunks, and crewmen accomplished additional conversion during the voyage. The convoy passed through the Panama Canal (31 January–1 February), and on 27 February reached Melbourne, Australia, where the troops and their equipment were disembarked and spent a week recuperating from the voyage, as well as reorganizing the cargoes that had been hastily if not efficiently loaded. The ships resumed their journey as convoy ZK.7 from Melbourne to Nouméa (6–12 March). John Erickson experienced engine trouble and fell behind but reached safe harbor at Nouméa on 18 March. The soldiers formed the advance elements of what activated on 27 May as the Americal Division, a contraction of American, New Caledonian Division, and was subsequently designated the 23rd Infantry Division but usually known by the popular name. Maj. Gen. Alexander M. Patch, USA, initially led the division, which saw hard fighting during the Guadalcanal Campaign.
Chicago meanwhile steamed between maneuvering positions from where she could help cover the convoy and the raid. Rear Adm. Fletcher’s TF 17, formed around Yorktown, rendezvoused with Vice Adm. Brown’s TF 11 and Lexington on 6 March 1942, and the combined task forces made for Rabaul and Gasmata on New Britain to attack Japanese ships deployed there in an effort to check the enemy advance. Japanese Rear Adm. Kajioka Sadamichi then (7–8 March) landed troops at Huon Gulf, in the Lae and Salamaua area on the eastern end of New Guinea. Crace and four heavy cruisers including Chicago and Australian ship Australia (D.84), Capt. Harold P. Farncomb, RAN, in command, and four destroyers of his squadron, formed TG 11.7 and helped cover the flattops as they thus shifted their attack to Lae and Salamaua and approached New Guinea.
Lexington and Yorktown launched Grumman F4F-3 Wildcats of VFs 3 and 42, SBD-2 Dauntlesses of VB-2, SBD-3s of VB-5 and VSs 2 and 5, and Douglas TBD-1 Devastators of VTs 2 and 5 while steaming in the Gulf of Papua. Launching from that gulf meant that the planes flew some 125 miles across the Owen Stanley Mountains, a range known for dangerous flying conditions, but their approach provided security for the task force and ensured that the planes surprised the enemy. The attackers sank armed merchant cruiser Kongō Maru, auxiliary minelayer Tenyō Maru, and transport Yokohama Maru, and damaged seaplane carrier Kiyokama Maru, light cruiser Yūbari, destroyers Asanagi, Asakaze, Oite, Yakaze, and Yūnagi, minelayer Tsugaru, transport Kokai Maru, and minesweeper No. 2 Tama Maru. One SBD-3 Dauntless of VS-2 was shot down, but 103 of the 104 attacking planes returned to the carriers. A following raid by USAAF Boeing B-17 Flying Fortresses and Royal Australian Air Force (RAAF) Lockheed Hudsons failed to inflict appreciable damage. The carriers and their screens retired at 20 knots on a southeasterly course until dark, when the ships steered eastward at 15 knots and rendezvoused with Crace’s ships, which again shepherded them as they withdrew. Nimitz summarized the raid as “well planned and well executed”, but Navy evaluators added that “it should not be forgotten that it did not dislodge the Japanese from New Guinea”. The strike nonetheless helped to convince the enemy of their need for additional carrier support to complete their conquest of the region, and thus indirectly set the stage for the Battle of the Coral Sea.
Chicago prepared for her next clash and landed two platoons from her marine detachment, which, together with a platoon of Royal Marines from Achilles, Capt. Hugh M. Barnes, RN, in command, practiced storming a beach near Nouméa, held by a second platoon of New Zealanders, on 24 March. “Platoons worked well and easily together,” Barnes reported, “and a most friendly spirit was noticeable between the various detachments.”
The Battle of the Coral Sea marked the first naval engagement fought without the opposing ships making contact (4–8 May 1942). The Japanese launched Operation MO — the seizure of Port Moresby, New Guinea, and points in the Solomon Islands, Nauru, and the Ocean Islands, preparatory to neutralizing Australia as an Allied bastion. Men of their 3rd Kure Special Naval Landing Force seized the RAAF seaplane station at Tulagi in the Solomons on 29 April. The Allies resolved to counter the enemy landings, and Chicago received orders on 1 May to set out from Nouméa and rendezvous with Fletcher’s TF 17, formed around Yorktown. Chicago screened the force on 4 May when the carrier launched a strike against the invading Japanese at Gavutu and Tulagi. F4F-3 Wildcats of VF-42, SBD-3 Dauntlesses of Bombing Squadron (VB) 5 and VS-5, and TBD-1 Devastators of Torpedo Squadron (VT) 5 sank destroyer Kikuzuki, minesweeper Tama Maru, and auxiliary minesweepers Wa 1 and Wa 2, and damaged destroyer Yuzuki, minelayer Okinoshima, transport Azumasan Maru, and cargo ship Kozui Maru.
Japanese transports under the command of Rear Adm. Abe Kōsō meanwhile that day sailed from Rabaul on New Britain in the Bismarck Archipelago, bound for Port Moresby. Crace deployed Chicago, Australia, and Hobart, screened by Farragut, Perkins, and Walke of Destroyer Squadron 9, to attack the Japanese ships as they sailed through the Jomard Passage, between the Louisiade Archipelago and New Guinea. Another Japanese force including seaplane tender Kamikawa Maru slipped into Deboyne in the Louisiades on 6 May, from where they deployed a mix of Aichi E13A1 Type 0, Mitsubishi F1M2 Type 0, and Nakajima E8N2 Type 95 reconnaissance floatplanes. These aircraft launched and searched primarily to the southeast on 7 May, and at 1240 one of the planes discovered the ANZAC Squadron but radioed sighting “one battleship, two heavy cruisers, and three destroyers,” bearing 175° at 78 miles from Deboyne, steering 310° at 16 knots.
On that morning of 7 May 1942, the Japanese sent 12 torpedo-carrying Mitsubishi G4M1 Type 1 attack planes of the Fourth Kōkūtai (Air Group), escorted by 11 Mitsubishi A6M2 Type 0 carrier fighters of the Tainan Kōkūtai, and 20 torpedo-carrying Mitsubishi G3M3 Type 96 land attack planes of the Genzan Kōkūtai, on separate raids against the elusive U.S. carriers. The Type Is reached the area where they suspected to find the carriers only to discover empty sea, and detached the fighters to return to refuel. The Type 96s meanwhile also searched fruitlessly, but as the Zeros flew back to New Britain they discovered Crace’s ships, and directed the two groups of bombers to their new quarries. A land attack plane added to the confusion at 1315 when it reported discovering the U.S. carriers, bearing 205° and 115 miles from the seaplane anchorage. Ironically, these aircraft also erroneously spotted the ANZAC Squadron, which led the enemy to redirect two strike groups of planes searching for the carriers against Crace’s ships.
The bombers (separately) attacked Crace, eluding radar detection by flying at low altitude. The admiral initially directed his ships to steam in a diamond antiaircraft formation, on course 090° and zig-zagging at a speed of 25 knots. Farragut steamed 1,400 yards off the port bow of Australia, with Perkins ahead and Walke off Farragut’s starboard bow. Farragut sounded general quarters at 1427 and the fighters attacked two minutes later from her starboard quarter. The ship fired 30 rounds of 5-inch ammunition from all of her guns without observing hits, at a mean range of 8,000 yards. Farragut sighted the Type 1 land attack planes off her port bow at 1500. The bombers circled ahead and approached sharp on the port bow in three groups, four planes to a group. Farragut opened fire with her forward 5-inch guns in director control, splashing one of the attackers, which burst into flames and plummeted into the sea. Some of the bombers dropped their torpedoes at ranges from 1,000–1,500 yards ahead of the formation, and others closed and dropped their torpedoes while flying inside the task force.
A Type 1 dropped a torpedo slightly on the port bow of Farragut, but the ship avoided the weapon by heading toward the bomber during its approach and then using left full rudder. The torpedo passed down the starboard side barely 50 yards clear, running shallow. Sailors fired 20 millimeter guns, Browning Automatic Rifles, and M-1 Thompson submachine guns at the airplanes when they passed into the arcs of fire of the 5-inch mounts. About five aircraft passed to starboard between Australia and Farragut and two to port, the Japanese strafing from their aft blisters as they hurtled by. Farragut ceased firing at 1508 after shooting an additional 120 rounds of 5-inch antiaircraft service, as well as 750 rounds of 20 millimeter ball and 750 more of tracer, and 208 rounds of small arms ammunition. One of the 20 millimeter rounds burned in the chamber of the No. 2 gun, temporarily putting it out of action. The gunners afterward surmised that they probably caused the casualty by removing the magazine before they fired the last round.
A Japanese bullet grazed Farragut’s SN1c Harold E. White, the gunner of No. 5 20 millimeter gun, over his right eye. Nearby crewmen administered first aid and White continued to man his weapon. FN2c Ernest F. Crofutt Jr., and GM3c James H. Gillespie suffered broken ear drums from the muzzle blast of the 5-inch guns. A Type 1 attack plane’s machine gun slightly damaged some of the topside structure, and a small caliber shell, tentatively identified as a 1.1-inch round apparently fired from one of the ships aft of Farragut, pierced her side at Frame 30 starboard, 10 feet above the waterline, and set paint on clothes in a locker afire in her Stateroom 101 starboard. The Repair Party controlled the flames. Allied sailors estimated that the Japanese dropped a total of four torpedoes at Chicago, three at Australia, and one at Hobart. Crace evaluated the enemy assault as “most determined but fortunately badly delivered.”
The ANZAC Squadron steered 295° at 30 knots at about 1513, scant minutes after the last of the Japanese torpedo planes winged off, when 19 of the Type 96s -- one evidently came about because of engine trouble -- approached from astern and up sun, in a massed ‘V’ formation above thin layers of clouds at an altitude of about 20,000 feet. At 1526 the planes dropped as many as 20 of their 500-pound bombs, four of which raised huge geysers of water around Australia that drenched her upper deck but narrowly missed the ship, while others near-missed Chicago and Perkins. Fragments fell on Perkins’ port side aft and on the director platform and the bridge, severing her low-frequency voice radio (TBS) antenna above the bridge. The cruisers and other destroyers heeled over during sharp turns throughout the battle, and avoided all of the bombs and torpedoes, but fragments killed two of Chicago’s crewmen, SM1c Anthony B. Shirley Jr., and BKR3 Robert E. Reilly, and wounded seven others. The ships splashed four Type 1 attack planes. Both sides continued to commit errors and suffered from inexperience, and the Japanese claimed to have sunk a California class battleship and damaged another battlewagon and a cruiser, but the Allies did not deploy any battleships in the Battle of the Coral Sea.
Friendly fire occurred again that afternoon when USAAF bombers mistakenly bombed the ANZAC Squadron. Allied planes flying from Garbutt Field at Townsville, Australia, attacked the Japanese in New Guinea more than once during the battle. One such raid struck the enemy on 7 May and as the planes, most likely Boeing B-17E Flying Fortresses of the 435th Bombardment Squadron of the Fifth Air Force (other accounts claim Martin B-26A Marauders) returned to Townsville during the afternoon watch, they misidentified the Allied ships as the Japanese Port Moresby Invasion Force. Some of the Army veterans recalled sighting airplanes at lower altitudes as they attacked ships, assumed that they were Marauders, and therefore decided to support their comrades. Three bombers of that strike flying at roughly the same altitude but apparently trailing behind, the first pair followed by their third companion, approached Farragut barely a minute later. The destroyer increased to flank speed and put her helm hard over to port as five bombs splashed off her starboard quarter where she would have steamed if she held to her original course. Some of the Allied antiaircraft guns opened fire on their attackers but missed and the planes continued back to Australia. A shot, apparently a 20 millimeter round, though whether from an enemy plane or an Allied ship could not be determined, wounded a Perkins crewman in his arm and chest. Perkins fired 102 5-inch, 420 20 millimeter, and 250 .50 caliber rounds during the fighting. The destroyer also suffered a gun temporarily out of action when a shell jammed No. 1 20 millimeter gun, but the gunners shifted the barrel and resumed firing.
“Fortunately, their bombing,” Crace afterward caustically observed, “in comparison with that of the Japanese formation a few moments earlier, was disgraceful.” Crace requested fighter cover at 1526 but communication and command errors, together with the Allied focus on seeking battle against the Japanese carriers, deprived him of air support. Fletcher sought to conceal the whereabouts of his carriers and maintained radio silence and did not reply, which, while likely the correct solution tactically, exascerbated Crace’s frustration. The British admiral brought his ships about to southerly courses and decided to deploy them overnight to a position about 250 miles from Port Moresby, so as to intercept the invaders if they debouched from the Jomard Passage or the China Strait — between the islands of Samarai and Sariba.
On 7 May TF 17 meanwhile, which had been joined by TF 11, Rear Adm. Aubrey W. Fitch in command and including Lexington, attacked the Japanese Carrier Strike Force, led by Vice Adm. Takagi Takeo and including carriers Shōkaku and Zuikaku, and sank small carrier Shōhō of the Close Support Force, Rear Adm. Goto Aritomo in command. Japanese airplanes sank Sims and damaged oiler Neosho (AO-23), which was afterward scuttled. The battle concluded the following day. Dauntlesses from Lexington and Yorktown damaged Shōkaku and forced her retirement. The Japanese bombed and torpedoed Lexington and bombed Yorktown, and Phelps (DD-360) scuttled Lexington. The Americans sustained heavy casualties including the loss of at least 69 planes to a Japanese loss of approximately 92 aircraft. The damage to Shōkaku and their aerial losses temporarily denied the Japanese the availability of Shōkaku and Zuikaku. The Allies achieved a strategic victory by halting the push southward and blunting the seaborne thrust toward Port Moresby. The Japanese deferred and then abandoned their occupation of Port Moresby by sea and shifted their advance overland across the Owen Stanley Mountains. Communication errors plagued the Allies and without additional information concerning the Japanese movements, Crace reluctantly came about just after midnight on 10 May and temporarily retired to Cid Harbor on Whitsunday Island. “In that battle we didn’t do very much,” Chicago’s Lt. Brown lamented, “except duck torpedoes.”
Following the battle, Chicago renewed her relationship with the people of Sydney when she entered the familiar harbor in company with Perkins. The Japanese repeatedly scouted Allied ports, however, and submarines I-25 and I-29 had launched aircraft that reconnoitered Sydney on 7 February and 23 May 1942, respectively. A third boat, I-21, Cmdr. Matsumura Kanji in command, operated in those waters, and W.F.O. Ito Susumu and his navigator/gunner, an enlisted man named Iwasaki, flew a Yokosuka E14Y1 Type 0 small reconnaissance seaplane from I-21 over the harbor on the night of 29 May. The enemy plane made its first pass over the harbor area at 0420, flew near the Royal Australian Navy (RAN)’s station at Garden Island, the dockyard at Cockatoo Island, and Sydney Harbour Bridge, and observed the various Allied and neutral vessels in the vital port. Ito and Iwasaki spotted Chicago amongst the other ships in the harbor but in the darkness erroneously identified her as a battleship. At one point Australian searchlights illuminated the plane but Ito climbed to cloud cover and then dropped again to continue the flight, and USAAF Bell P-39 Airacobras of the 35th Pursuit Squadron attempted to intercept the intruder but the plane escaped, only to capsize and sink in heavy swells while attempting to land near I-21 off Norah Head. The submarine rescued both crewmen and Ito apologized to Matsumura for losing the aircraft.
During the first dog watch on 31 May 1942, I-22, I-24, and I-27 operated in areas six and seven and a half miles off Sydney and launched three Type A Kō-hyōteki midget submarines, each manned by two crewmen: M-22b (HA.21), Lt. Matsuo Keiu and PO2c Tsuzuku Masao; M-24b, Lt. (j.g.) Ban Katsuhisa and PO Ashibe Mamoru; and M-27b (HA.14), Lt. Chuman Kenshi and PO1c Omori Takeshi, respectively. I-22, I-24, and I-27 then shifted to the waters off Port Hacking and waited for the midget submarines to return, while the midget submarines penetrated Sydney’s defenses after dusk. At about 2005, M-27b became entangled in an antisubmarine boom near the harbor’s entrance, between George’s Head and Watson’s Bay. An Australian Maritime Services Board watchman spotted an object caught in the boom that raised his suspicions and he alerted his chain of command. Australian patrol boat Lolita investigated and one of her sailors spotted M-27b, and the converted yacht dropped at least two depth charges, but the devices failed to explode in the shallows.
M-24b followed the Manley ferry through the net at around 2200 and stalked the vessels in the harbor, which, in addition to Chicago and Perkins, included Australian heavy cruiser Canberra (D.33), Australian light cruiser Adelaide (D.47), and Dobbin. A number of people sighted the low silhouette of the submarine’s conning tower and sounded alerts, and the bedlam escalated as ships crisscrossed the area while ferries continued to ply their trade. Australian patrol boat Yarroma attacked M-27b with four depth charges at 2235, and Chuman and Omori apparently detonated their scuttling charges, sinking their submarine and killing themselves. Australian auxiliary patrol boat Lauriana sighted M-22b at 2252. Almost simultaneously, one of Chicago’s sailors sighted M-24b’s conning tower awash barely 300 yards on the starboard quarter, and the cruiser illuminated the submarine with a searchlight and tracers lighted the night sky as she opened fire with machine guns. The ship could not depress her 5-inch battery low enough to strike M-24b, however, and the boat submerged. Perkins prepared to defend the cruiser, but Capt. Howard D. Bode, Chicago’s commanding officer, ostensibly believed that only a single submarine had infiltrated the harbor and ordered the destroyer to pick up her old buoy inshore of Chicago. Australian patrol boat Yandra made speed and attempted to ram M-22b, but the Japanese submarine deftly dodged the attack. At 2310 Australian corvette Geelong (J.201) fired on an unidentified object, most likely M-24b, but missed.
Just after midnight on 1 June, Yandra depth charged but missed M-22b. Ban and Ashibe doggedly continued to stalk their prey and M-24b fired two 17.7-inch torpedoes at Chicago at 0029, both of which missed the cruiser. The first torpedo passed under Dutch submarine K IX and exploded beneath Australian accommodation ship Kuttabul, moored at Garden Island, sinking the ship and killing 19 Australian and two British sailors, and wounding at least ten men. Rescuers bravely pulled the survivors from the vessel as she sank, and the attack also damaged K IX beyond economical repair. The second torpedo ran onto rocks on the eastern side of the island and failed to explode. Chicago parted her mooring lines and sortied for the open sea, and at about 0300 her lookouts sighted a “submarine” slipping into the harbor, possibly M-22b, and a minute later the harbor indicator loop registered a vessel crossing in bound.
Australian armed merchant cruiser Kanimbla (F.23) shot at M-22b near Bradley’s Head at 0350, and at 0450 Australian auxiliary antisubmarine vessel Doomba’s sonar detected the intruder off Robinson’s Point. Her lookouts also sighted a submarine slipping into Sydney, possibly M-22b. Australian minesweeper Goonambee discovered M-22b at about 0500, and for nearly an hour patrol boats Sea Mist, Steady Hour, and Yarroma depth charged the elusive boat. Matsuo and Tsuzuku shot themselves, and Steady Hour dragged her anchor and snagged the sunken boat, which divers later discovered at Taylors Bay. M-24b sank shortly thereafter, so that all three of the midget submarines were lost in the attack. Divers discovered M-24b’s wreck off Bungan Head in November 2006, and noted bullet holes in her conning tower, indicating that at least some of Chicago’s rounds struck home. The Australians initially recovered the bodies of Matsuo, Tsuzuku, Chuman, and Omori and on 9 June cremated them with full naval honors, and the Japanese later returned their ashes to their homeland. The Australians raised and partly salved M-22b and M-27b, and combined the bow of the one with the stern of the other into a composite boat, which they displayed at Bennelong Point, now the site of the Sydney Opera House, to raise funds for the RAN Relief Fund and the King George Fund for Merchant Sailors, and then carted the submarine around the country on a tour to raise additional funds, before they shifted her to a more permanent display at the Australian War Memorial. The three enemy fleet boats waited vainly for their charges to return, but on 3 June came about and resumed hunting Allied ships. I-24 returned to the area on the night of 8 June, surfaced and fired ten rounds at Sydney Harbour Bridge, submerged and escaped, her attack again causing some people in the area to panic in fear of an invasion.
British Rear Adm. Victor A.C. Crutchley, RN, relieved Crace in command of TF 44, a task force formed from a number of the ships that had served with the ANZAC Squadron, on 13 June 1942. On 29 July Saratoga detached Lt. Robert M. Bruning Jr., to act as a fighter direction officer for Crutchley on board Australia, but Bruning lacked familiarity with Australian procedures and decided instead to work from Chicago while she took part in Operation Watchtower — landings by the 1st Marine Division on Japanese-held Guadalcanal, Florida, Gavutu, Tanambogo, and Tulagi in the Solomon Islands. Chicago meanwhile rendezvoused with the invasion transports at Wellington, New Zealand. In the interim (1–10 August) the British Eastern Fleet, Adm. Sir James F. Somerville, RN, in command, attempted to divert Japanese attention by carrying out Operation Stab — a thrust against the Andaman Islands in the Bay of Bengal.
On 7 August 1942, planes from Enterprise, Saratoga, and Wasp (CV-7) strafed and bombed enemy gun emplacements and supply dumps, and flew reconnaissance and CAP missions as the marines wrestled control of the neighboring islands from the Japanese, and simultaneously moved inland on Guadalcanal. Chicago joined other ships that escorted transports, led by Rear Adm. Richmond K. Turner, Commander Amphibious Force, South Pacific, and she then pounded the beaches in preparation for the landings, following which, the ship patrolled the nearby waters. When the Japanese learned of the Allied invasion they dispatched reinforcements to Guadalcanal, only to turn them around upon receiving further intelligence concerning the strength of the forces arrayed against them, but counterattacked in the air that afternoon.
The RAN had established the Coast Watch Organization prior to the war and PO Paul E. Mason, RANVR, a coastwatcher planter who observed the enemy from the area of Buin in southern Bougainville, warned “From STO, 24 bombers headed yours” as at least 27 bombers and 16 dive bombers roared toward the ships offshore. Chicago detected the attackers on her radar and Lt. Bruning was among the fighter direction officers on the ships who vectored Wildcats from Enterprise and Saratoga that intercepted and claimed to splash 16 of the attackers, but lost 15 Wildcats in battle or to accidents — the Americans positioned their fighters poorly and committed them to battle piecemeal, while the Japanese lost only two Zeros in aerial combat but shot down nine Wildcats. One of the Grummans, an F4F-4 flown by Ens. Joseph R. Daly, USNR, of VF-5 on Scarlet 8, one of Saratoga’s CAP stations, fell in flames when a Zero shot down the Wildcat. Daly bailed out and splashed into the water off Berande Point, suffered from the agonizing pain of his burns, and afterward reflected that the saltwater “felt wonderfully soothing” as he resolutely swam a slow breaststroke for shore. One of Chicago’s SOC-1s, flown by VCS-4’s Ens. John W. Baker, USNR, searched for Japanese submarines and spotted Daly and alighted in the water to investigate. Baker could not immediately identity Daly because of the pilot’s burned face and grew suspicious of an enemy flier and drew his .45 caliber pistol. The swimmer cheerfully hailed his rescuer, however, and Baker pulled the wounded man into the Seagull’s aft cockpit and he sat on the radioman’s lap. Baker intended to fly him to Vincennes (CA-44), the nearest cruiser he sighted, but eventually brought him to Chicago early in the first dog watch. A Japanese carrier [dive] bomber of the 2nd Kōkūtai damaged Mugford (DD-389), and after San Juan (CL-54) bombarded the enemy while maneuvering in Tulagi Bay, an explosion in one of her forward 5-inch gun mounts damaged the ship.
The following day, the marines captured the unfinished Japanese airstrip and named it Henderson Field in honor of Maj. Lofton R. Henderson, USMC, who had been shot down while leading VMSB-241 on an unsuccessful attack on Hiryū at Midway. Lt. William J. Read, RANVR, a coastwatcher stationed near Pora Pora on northern Bougainville, reported an incoming raid of an estimated 40 bombers flying from northwest to southeast, and another coastwatcher relayed the information, which reached Crutchley on board Australia. Thanks to the timely intelligence -- sent before Chicago detected the incoming planes on her radar -- Bruning helped rotate Wildcats through their CAP stations when as many as 26 land attack planes of the 4th and Misawa Kōkūtais fiercely assaulted the invasion ships. Wildcats and antiaircraft fire splashed 17 of the attackers, and Chicago fought as one of the ships that fired at the attackers as they swept past toward the transports. The enemy nonetheless torpedoed Jarvis (DD-393) (Lt. Cmdr. William W. Graham, commanding) and transport George F. Elliott (AP-13). A Japanese airplane also crashed the latter, and Hull (DD-350) scuttled her. Another crashing bomber damaged Barnett (AP-11).
Following the landings and the fighting on 7 and 8 August 1942, Crutchley deployed his ships into four groups to protect the amphibious forces offshore. The first element comprised two destroyers, Blue (DD-387) and Ralph Talbot (DD-390), which operated as radar pickets and screened the northern entrance into the area. Savo Island rises to the northwest of Guadalcanal and effectively splits the channel that sailors labeled “The Slot” or, more grimly, “Ironbottom Sound” for the ships whose rusting hulks eventually littered the bottom. As a result, the admiral deployed two groups to cover the inner entrances into the landing area. Capt. Frederick L. Riefkohl broke his flag in Vincennes in command of the Northern Group, which also comprised Astoria, Quincy (CA-39), Helm (DD-388), and Wilson (DD-408). Crutchley broke his flag in Australia and led the Southern Group, along with Canberra, Chicago, Bagley (DD-386), and Patterson (DD-392). Rear Adm. Norman Scott led the fourth element, TF 62.4, which operated to the eastward to guard the transports at Tulagi, and consisted of San Juan (one of her 5-inch mounts out of commission), Hobart, Buchanan (DD-484), and Monssen (DD-436).
The Japanese reacted vigorously and Vice Adm. Mikawa Gunichi led a surface force that slipped undetected to the west of Savo Island and inflicted a singularly devastating defeat upon the Allies. Mikawa broke his flag in heavy cruiser Chōkai and led light cruisers Tenryū and Yūbari and destroyer Yūnagi out of Rabaul. Rear Adm. Gotō Aritomo reinforced Mikawa with the heavy cruisers Aoba, Furutaka, Kako, and Kinugasa of CruDiv 6 from Kavieng, New Ireland. The two forces rendezvoused and steamed southerly courses to lunge at the Allied ships off Guadalcanal and the neighboring islands (7–8 August).
The U.S. Naval War College later analyzed the strengths and weaknesses of the rival forces. Allied strengths included: many of their ships mounted radar; they counted more guns on board the ships that took part in the battle — and more torpedo tubes in their destroyers; and they operated additional ships in the area. Their weaknesses included: two days of fighting had worn out their men and they desperately needed rest; they deployed their ships separately and thus opened them to destruction piecemeal; they lacked an overall battle plan; the commanders of the different groups lacked familiarity with each other’s tactical plans; their intelligence proved woefully inadequate; and they suffered communications issues.
The Japanese strengths included: they surprised the Allies; they attained the initiative; they entered the battle with more wartime experience; the enemy counted more torpedo tubes in their cruisers; and most particularly in regard to the Battle of Savo Island, they had trained extensively to fight at night and developed corresponding equipment and tactics — including optical equipment and lookouts trained for night searches, floatplanes that dropped flares to illuminate their foes, and deadly long-range Type 93 torpedoes that churned minimal wakes which reduced the chances of Allied sailors spotting the approaching weapons. Thus, the Allies possessed some material superiority; the Japanese morale and tactical superiority.
The Japanese air raids delayed the Allies from off-loading the marines’ supplies and equipment, and focused them on expecting further enemy aerial attacks, a problem compounded by a series of intelligence and communications errors. Allied forces including RAAF Lockheed Hudsons and S-38 (SS-143), Lt. Cmdr. Henry G. Munson in command, sighted and reported some of the enemy ships en route to Guadalcanal, but one such message erroneously identified the approaching menace as a pair of seaplane tenders escorted by cruisers and destroyers. Turner therefore believed that the Japanese ships intended to establish a seaplane base at Rekata Anchorage on Santa Isabel, and requested that Rear Adm. John S. McCain, who led TF 63, send USAAF Flying Fortresses to bomb Rekata the next morning. At 1807 Fletcher, concerned about the potential enemy threat to his carriers, together with plane losses and low fuel, signaled Vice Adm. Robert L. Ghormley, Commander South Pacific Area, requesting permission to withdraw the ships, and opened the range from Savo while awaiting Ghormley’s reply. Turner called a conference to discuss the tactical options on board his flagship, McCawley (AP-10), during the second dog watch, and at 2130 Crutchley left Australia for the meeting. Crutchley directed Bode to temporarily command the Southern Group, but his departure deprived the group of Australia’s firepower, and he also neglected to inform the other groups of his decision concerning Bode. The conference attendees, including Turner, Crutchley, and Maj. Gen. Alexander A. Vandegrift, USMC, who commanded the 1st Marine Division, regretfully decided that because of the lack of air cover against the ongoing aerial threat, they would order the transports’ withdrawal the following morning — before they completed unloading. Crutchley weighed the option of returning at night and without radio communications, risking a friendly fire situation or the possibility of ships colliding in the darkness and narrow waters, and remained on board his flagship near the transports. Bode assumed that the admiral would return shortly and did not reposition Chicago to optimize the screen, and went to bed without issuing night orders.
The night proved to be a dark one, and a four knot breeze from the northeast moved low-hanging clouds that drifted across the sky and added to the darkness. Occasional thundershowers swept the otherwise calm sea. Mist and rain hung heavily about Savo Island and further reduced the visibility in that direction. Just after midnight at 0132 on 9 August 1942, the Southern Group steamed on course 306° at 12 knots, and approached the northern end of their patrol line. Canberra led the formation, and Chicago followed her about 600 yards astern. Patterson sailed about 45° on Canberra’s port bow at a distance of 1,500–1,800 yards, while Bagley held the same relative position on the Australian cruiser’s starboard bow. Chicago, Bagley, and Patterson all operated in Condition of Readiness II, which theoretically meant that half of their armament and all of their fire control and communication stations were sufficiently manned and ready for immediate use. The grueling pace and sweltering tropical weather led some of the ships’ captains to humanely allow men to relax their awareness, however, and hundreds of sailors and marines slept in their bunks or relaxed at their stations. Canberra operated in British Condition of Readiness II, a normally higher state of readiness than her American counterparts that required that the ship fully man all action stations, though some of her company rested at their stations or left to obtain food or answer nature’s call. Capt. Bode, Capt. Frank E. Getting, RAN, and Lt. Cmdr. George A. Sinclair, the commanding officers of Chicago, Canberra, and Bagley, respectively, all lay asleep, and only Cmdr. Frank R. Walker, Patterson’s commanding officer, was awake in the four ships of the Southern Group.
Mikawa meanwhile led his ships at high speed toward Guadalcanal. Aoba launched an Aichi E13A1 Type 0 reconnaissance floatplane, and then Chōkai, Furutaka, and Kako all sent aircraft aloft, most likely E13A1s or Mitsubishi F1M2 Type 0 observation floatplanes, which flew southward to take a final look at the Allied dispositions. A number of Allied ships detected these aircraft on their radar or spotted them visually, but mostly complacently assumed them to be friendly, in some cases because lookouts observed them flying with running lights. Chōkai spearheaded the Japanese formation, and at 0054 her lookouts spotted Blue, heading at them from a distance of about five miles. Just as Mikawa prepared to open fire on Blue, the picket ship turned 180° and steamed away from the Japanese ships while she continued to patrol, unaware of the impending peril. Ralph Talbot operated to the north and Mikawa accordingly slipped between the two sentinels undetected. The Japanese ships rounded the southern side of Savo Island, Yūnagi came about, possibly to guard the rear of the column, and at 0133 Mikawa gave the order “All Ships Attack!” Three minutes later his scouts picked up Bagley and Patterson, followed shortly by Canberra and Chicago, and the Japanese launched torpedoes and opened fire. Furutaka shot torpedoes at Jarvis, damaged the previous day, but missed the destroyer. Chicago logged the chaotic sequence of events as follows: her crewmen saw orange flashes at 0142; the first of five aircraft flares at 0143; Canberra turned at 0145; dark objects and torpedo wakes at 0146; a torpedo slammed into her at 0147, and flashes of gunfire erupted close aboard on both her port and starboard bows — most likely Patterson.
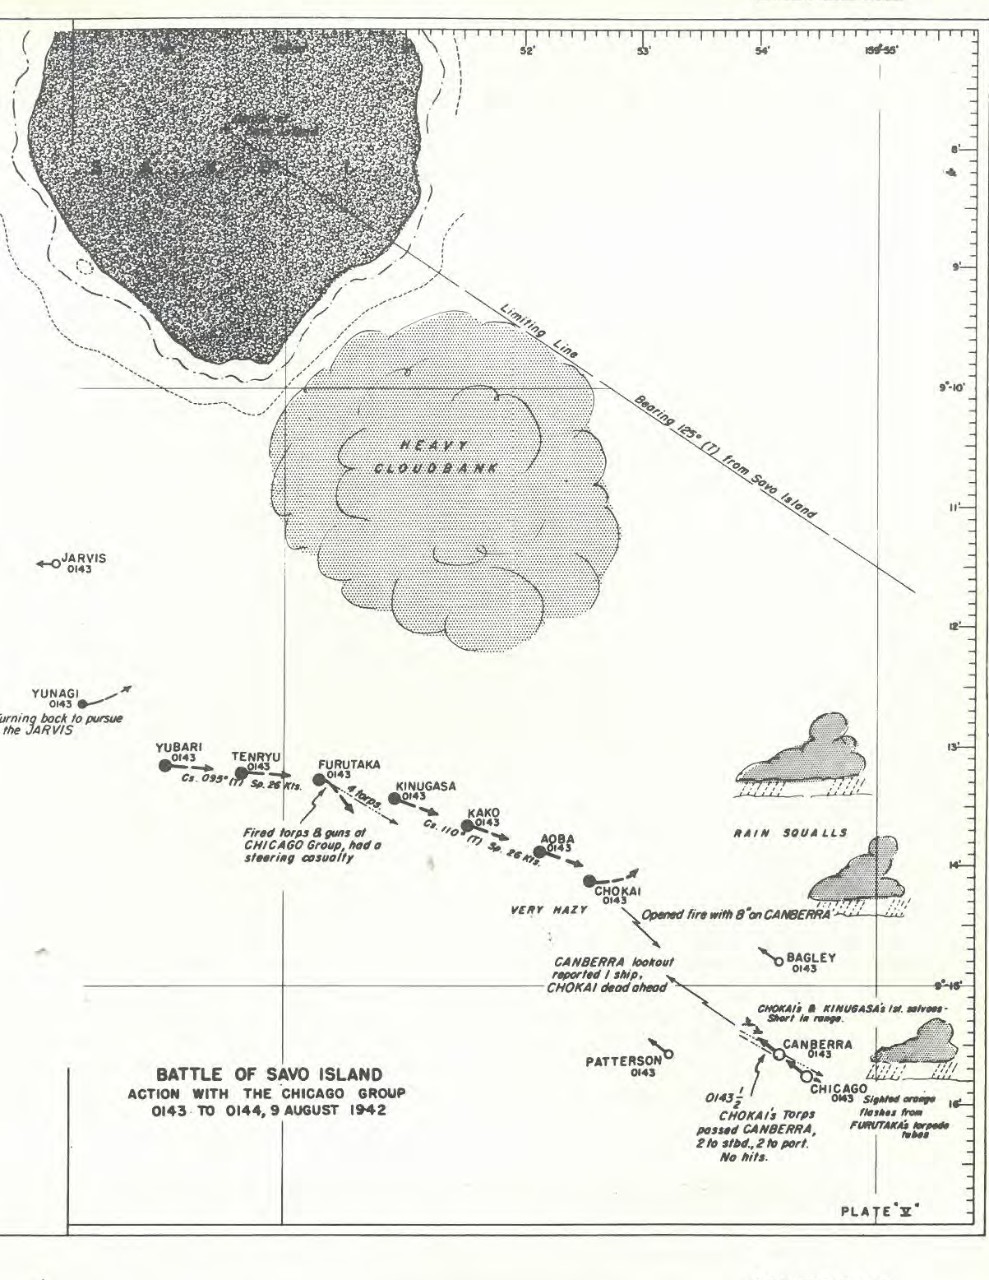
Patterson suddenly sighted the attackers, notified Chicago and Canberra by blinker, and broadcast by TBS, “Warning -- Warning: Strange Ships Entering Harbor!” At the same time, the destroyer turned left to unmask her guns and torpedo batteries. Canberra’s port lookout sighted a ship dead ahead at 0143, and when her bridge watch team could not identify the vessel they called Getting and the navigation officer to the bridge, both of whom arrived quickly. Japanese planes dropped several bright flares from above the clouds over the north coast of Guadalcanal, just southeast of the transports, at about 0145. The flares burned intensely brilliant and blue-white, and the first floatplane dropped them in a straight line, evenly spaced about a mile apart. That plane or another then repeated the maneuver, illuminating the darkness with deadly intent. In the midst of the confusion, Cmdr. Joseph W. Callahan, Ralph Talbot’s commanding officer, heard a voice he recognized as that of Cmdr. Walker, reportedly say over TBS at about 0150: “Warning, warning, three enemy ships inside Savo Island.”
Within the first few minutes, the enemy changed course to the eastward and closely followed the south shore of Savo Island. With the change of course Allied watchstanders could see two ships, which appeared initially to be a Mogami class heavy cruiser and the second a Sendai class light cruiser — which they identified as a Jintsū type. Some observers on Patterson’s bridge reported seeing three cruisers and thought that the second in the column was a Katori class light cruiser. When their movement and Patterson’s turn brought the Japanese cruisers to a relative bearing 70° and a distance of 2,000 yards Walker ordered “Fire torpedoes,” but at the same instant the destroyer’s guns opened fire, so that the order went unheard and no torpedoes left the tubes. Patterson fired two four-gun star shell spreads, after which her No. 3 gun continued star shell illumination until it was hit. The ship used these in preference to the searchlight in order to avoid possibly silhouetting the Allied cruisers. As Patterson’s other guns opened with service projectiles, the Japanese illuminated her with their searchlights and opened heavy fire, and launched a spread of eight torpedoes. One shell hit the No. 4 gun shelter and ignited ready service powder. Flames enveloped the after part of the ship and No. 3 and 4 guns were put out of action, the latter only temporarily. The ship zigzagged at high speed while a torpedo passed about 50 yards on her starboard quarter. She then steadied out on an easterly course, roughly parallel to that of the enemy. Her No. 1 and 2 guns maintained a rapid and accurate fire, in which No. 4 soon rejoined and all told during the battle, Patterson fired 20 rounds of illuminating and 50 rounds of service ammunition.
Just before the enemy ships changed from a southeasterly to an easterly course, and therefore about a minute after Patterson sighted them, Bagley saw unidentified vessels about 3,000 yards away, slightly on her port bow. Like Patterson, Bagley swung hard left in order to fire torpedoes. In less than a minute she steamed abeam of the enemy, about 2,000 yards distant, but before her crewmen could insert primers in the starboard torpedo battery, Bagley turned past safe firing bearing. She therefore continued her turn to the left to bring the port tubes to bear. This required several minutes more, by which time she opened the range to 3,000–4,000 yards. Bagley shot four torpedoes and continued her circle, went westward, and scanned the passage between Savo Island and Guadalcanal without sighting anything. Patterson and Bagley both escaped with minor damage because the enemy focused on the Allied cruisers.
Canberra valiantly struck back but Japanese shells and torpedoes slammed into the ship, mortally wounding Getting — who died of his wounds on board Barnett on passage to Nouméa and was buried at sea on 9 August. Cmdr. John A. Walsh, RAN, the executive officer, took command but was wounded, and Lt. Cmdr. Donald M. Hole, RAN, the gunnery officer, also died. The enemy attack caused fearsome damage, and one hit on the barbette jammed A Turret in train, and another shell exploded between the guns of X Turret. A hurricane of shot crashed into the 4-inch gun deck, knocking out many of the guns and scything down most of the gun crews. The ship’s embarked Supermarine Walrus amphibious reconnaissance biplane burst into flames, and a serious fire started in the torpedo spaces, along with other blazes at various points. As a result of the torpedo explosion, light failed across the ship. The engine rooms filled with smoke and she listed about 10° to starboard.
Chicago’s lookouts sighted two orange colored flashes near the surface of the water close to Savo Island, but apparently did not spot the Japanese ships until Canberra swung to starboard. The first flare illuminated the night over the transport area shortly thereafter, and about two minutes later Canberra turned. As she swung her helm over, Chicago’s watchstanders saw two dark objects between Canberra and Patterson and another to starboard of the Australian cruiser. The enemy meanwhile launched torpedoes and Kako fired some that raced toward Chicago, which trained her 5-inch director on the dark object to her starboard, beyond Canberra. Chicago prepared to fire a star-shell spread when the starboard bridge lookout reported a torpedo wake to starboard, and she started to turn with right full rudder. The warship began her turn to starboard when the main battery control officer sighted two torpedo wakes approaching her port bow, crossing from port to starboard. The men on the bridge did not see the first torpedo to starboard and so gave the ship left full rudder, intending to steady out when the ship’s course paralleled the wakes. At that point, however, they sighted a silhouette they believed to be a destroyer in a position to fire torpedoes farther to port, and ordered the cruiser to swing farther to the left. Before the helmsman could comply, the talker in main battery control forward saw the wake of one of Kako’s torpedoes headed for the port bow, and at almost the same moment the weapon struck the bow. “The forward part of the ship to amidships was deluged with a column of water which was well above the level of the foretop,” Chicago reported. The shock reverberated through the ship as the torpedo all but blew the bow off below the water line and tore in the chain locker, and the two anchor chains trailed down underneath her. Chicago’s port battery fired two four-gun salvos of starshell toward the flashes to port, while the starboard battery fired the same number off her starboard bow, set for 5,000 yards, to illuminate what appeared to be a cruiser firing at Canberra. Not one of the 16 star shells that Chicago fired at this critical moment functioned, and she thus failed to reliably identify the enemy.
A shell hit the starboard leg of Chicago’s foremast, detonated over the forward funnel, and showered fragments over the ship. Shortly afterward a ship ahead, which Chicago’s crewmen thought to be Patterson, illuminated with her searchlight two ships which appeared to be destroyers on the port bow. Chicago’s port battery opened up on the left hand destroyer with a range of 7,200 yards and her gunners believed that they her twice — as it turned out Tenryū trailed near the end of the enemy column and Chicago lightly damaged her. The poor visibility meanwhile prevented the main battery director from picking up the cruiser on the starboard bow, and the starboard 5-inch battery shot all of the ready service star shells without the main battery’s being able to get a “set up” on the target, largely because only six of the 44 star shells she fired functioned. At about this time the port 5-inch battery also lost its target, the destroyer 7,200 yards on the port bow, but just before firing ceased the burst of a hit was seen. In an effort to relocate this target, Chicago opened the shutters on her No. 2 and 4 searchlights as the ship swung to port, but the searchlights swept only empty sea.
In the meantime the Allied and Japanese ships blasted each other to Chicago’s starboard but the fighting moved on to the northward. The cruiser’s Director II identified a ship toward her starboard quarter and one to her port beam, but identified them as (probably) Patterson and Bagley, respectively, as the enemy attacked the Northern Group — and Bode failed to warn those ships. Mikawa made a rapid course change with his leading three cruisers, Aoba, Kako, and Kinugasa, at 0144. The second trio of cruisers in this column, Furutaka, Tenryū, and Yūbari, however, missed the maneuver and the inadvertent split created two separate attacking divisions. Although this created a command and control problem for Mikawa, it put the Allied Northern Group between the two attacking forces. The enemy brought devastating fire to bear on the task force and savaged Astoria, Quincy, and Vincennes.
The shift in the fighting enabled Chicago to take stock of the situation. Damage control reported that seawater flooded some forward compartments, but men shored bulkheads and her engineering team thought that the ship could make 25 knots. The radiomen decoded a message ordering the cruiser to withdrawal toward Lengo Channel, and she slowed to 12 knots. Firing broke out to the westward of Savo Island five or six minutes later, and Chicago moved toward the fighting at full speed. The ship fired a star shell spread off her starboard beam set for 11,000 yards a few minutes later. The Japanese steamed out of range, however, and Chicago ceased fire. Her lookouts sighted a fire visible in the distance at about 18,000 yards but could not discern whether it rose from ships on the nearer or far side of Savo Island — the blaze probably originated from the brief flurry of action as Ralph Talbot swung round and attacked the enemy ships. The firing meanwhile ceased, the cruiser’s crewmen could not see ships in the vicinity, and she consequently slowed to 12 knots, trailing the anchor chains.
Mikawa emerged from his pass around Savo Island and contemplated making another attack against the Allied ships, which appeared in disarray. The Japanese had to regroup, however, and daylight approached, which would have made them susceptible to air attack — and they did not know the location of the Allied carriers. In addition, they had already attained surprise but the Allies were alerted, and the Japanese had fired all of their torpedoes and an attack using only their guns invited further risk. Mikawa therefore gave the order to retire up The Slot at 0220.
The Japanese killed 1,077 Allied sailors and marines and wounded over 700 more men during the Battle of Savo Island. They sank four Allied cruisers: Aoba, Chōkai, Kako, and Kinugasa sank Astoria by gunfire; Aoba, Furutaka, Kako, and Tenryū sank Quincy by gunfire — and Yūbari torpedoed her; Chōkai used guns and torpedoes and Aoba, Kako, Kinugasa, and Yūbari their guns and sank Vincennes. Despite efforts to salvage Canberra she had to be abandoned; Ellet (DD-398) and Selfridge (DD-357) scuttled the heavy cruiser with gunfire and torpedoes, and she slid beneath the waves at 0800. In addition: Kako damaged Chicago; Furutaka, Tenryū, and Yūbari hit Ralph Talbot; and Tenryū and Yūbari damaged Patterson. Allied gunfire lightly damaged four Japanese ships: Chicago and Patterson damaged Tenryū; Astoria and Quincy hit Chōkai; Quincy damaged Aoba; and Vincennes struck Kinugasa.
Mikawa’s overwhelming victory proved illusory in the long term, however, because he failed to attack the nearby transports when he came about to clear the area by sunrise and escape aerial retaliation. The supply ships withdrew but the limited amount of cargo which they had landed combined, with those the marines seized from the Japanese, to enable the Leathernecks to maintain their tenuous hold on Guadalcanal. As Kako retired from the battle the following day, S-44 (SS-155) sank her near Kavieng, 02°15'S, 152°15'E, an exploit for which Lt. Cmdr. John R. Moore, the submarine’s commanding officer, received the Navy Cross. Japanese land attack planes of the Misawa Kōkūtai mistook Jarvis for a New Zealand Achilles class light cruiser and torpedoed her about 200 miles southeast of Tulagi, near 09°42'S, 158°59'E. Jarvis put up a stout fight and splashed two of the attacking planes, and a third ditched due to battle damage, but the ship went down with all hands.
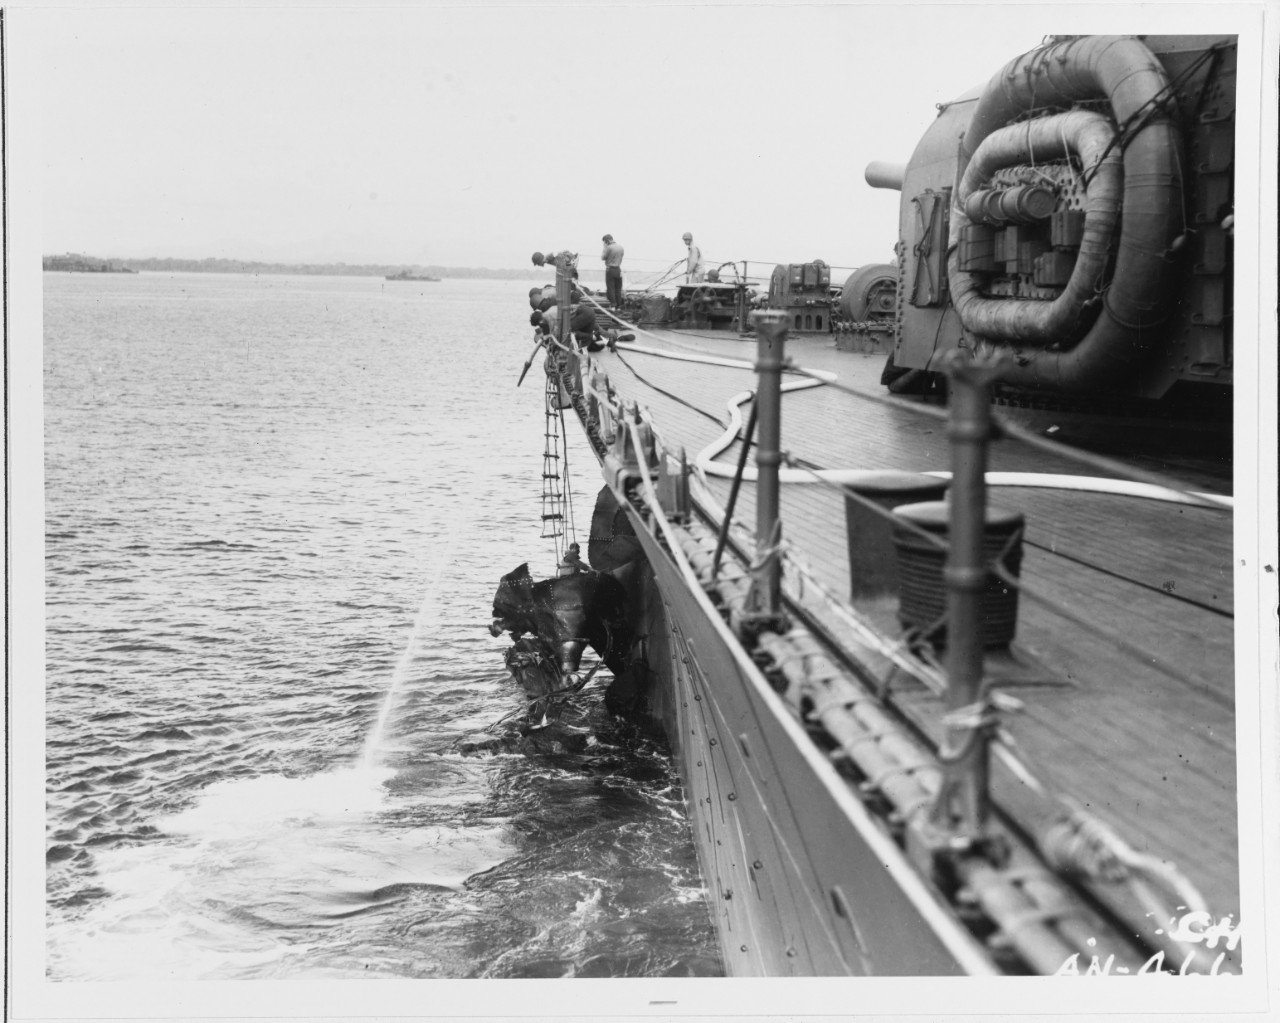
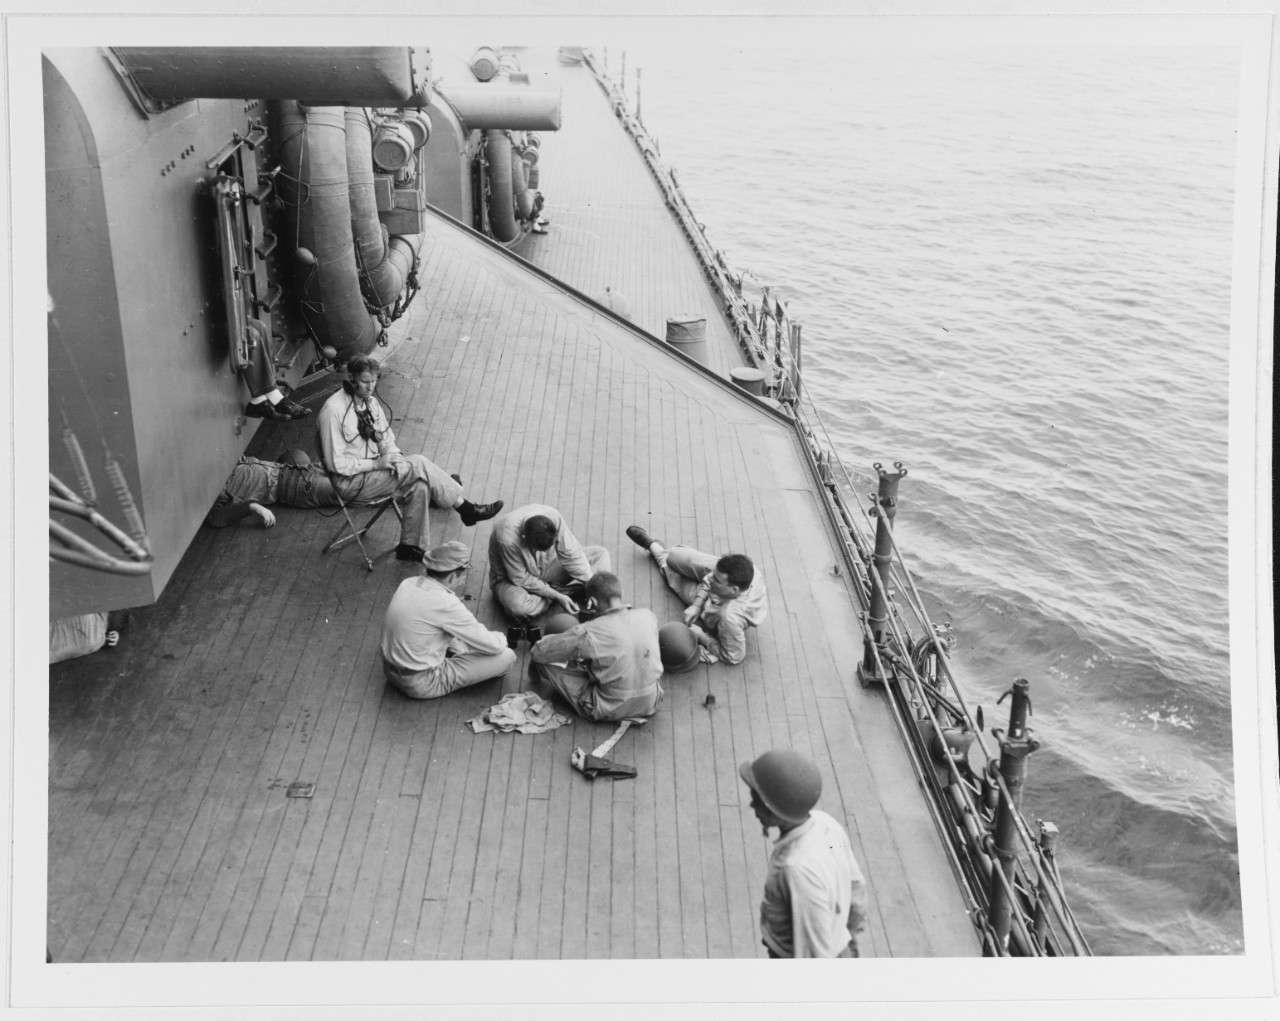
Chicago completed temporary repairs at Nouméa, where divers cut away some of the damaged hull, and then acquired a temporary bow while in Sydney. The ship set out from Australian waters and reached San Francisco on 13 October 1942, and began extensive repairs that including installing a new bow and overhauling the engines. Following his relief that year, Capt. Bode died from a self-inflicted gunshot wound at Naval Hospital Balboa on 20 April 1943.
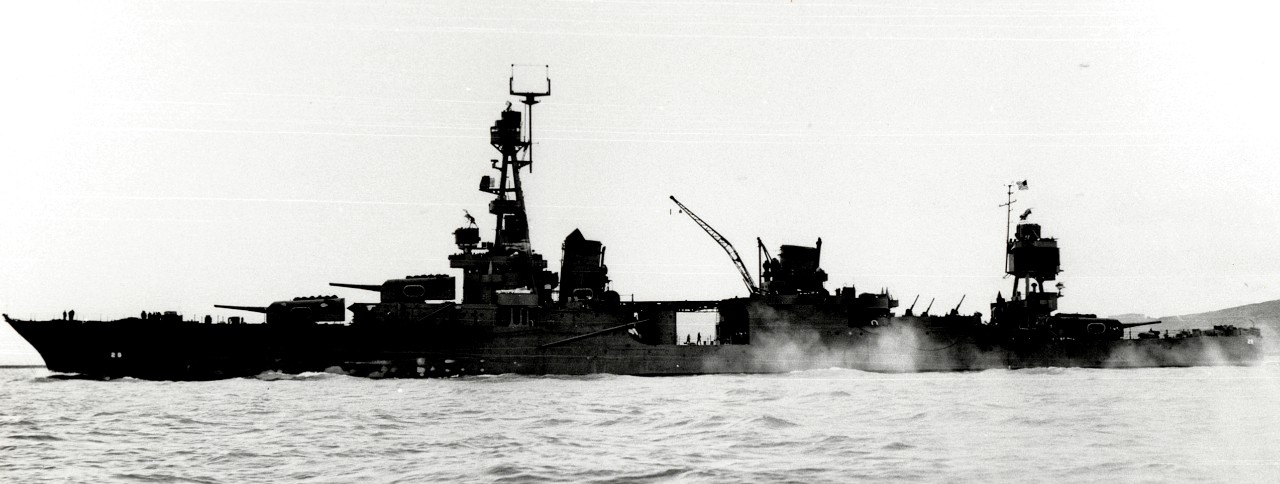
On New Year’s Day of 1943 meanwhile, Chicago departed San Francisco, action-bound once more. The Japanese reluctantly organized Operation Ke to evacuate their main force troops from Guadalcanal, and initiated a series of air and naval operations to cover their withdrawal. Early in the New Year, Allied reconnaissance planes discovered Japanese warships maneuvering between Truk Lagoon in the Carolines and the Solomons, and many of the Allied leaders believed that the movements presaged a major clash. “It appeared possible,” a Navy communique subsequently stated, “that the Japanese fleet might accept a decisive battle.” Adm. William F. Halsey Jr., who had relieved Ghormley in command of the South Pacific Area, dispatched multiple Allied forces to contain the apparent enemy thrust. Enterprise got underway with TF 16 to proceed to the vicinity of Malaita in the Solomons to counter a possible Japanese thrust on 5 January, but came about and two days later anchored in Segond Channel at Espíritu Santo in the New Hebrides [Vanuatu].
Countermove followed move, and later in the month Rear Adm. Robert C. Giffen broke his flag in Wichita (CA-45) in command of TF 18, a close support group that also comprised: auxiliary aircraft carriers Chenango (ACV-28) and Suwanee (ACV-27); Chicago and Louisville; Cleveland (CL-55), Columbia (CL-56), and Montpelier (CL-57); and Chevalier (DD-451), Conway (DD-507), Frazier (DD-607), La Vallette (DD-448), Meade (DD-602), Taylor (DD-468), and Waller (DD-466). The admiral led the ships out of Havannah Harbor on Efate at 1700 on 27 January 1943, to cover the four transports and their four escorting destroyers of TG 62.8 as they carried Army troops earmarked to relieve the 2nd Marines, who had been fighting on Guadalcanal since August 1942. Enterprise and her screen steamed about 250 miles beyond the task force, ready to launch her airplanes against the enemy. Giffen was to protect the convoy, and to rendezvous with an additional four destroyers operating from Tulagi and sweep the area north of Guadalcanal, in order to screen the transports as they unloaded the troops.
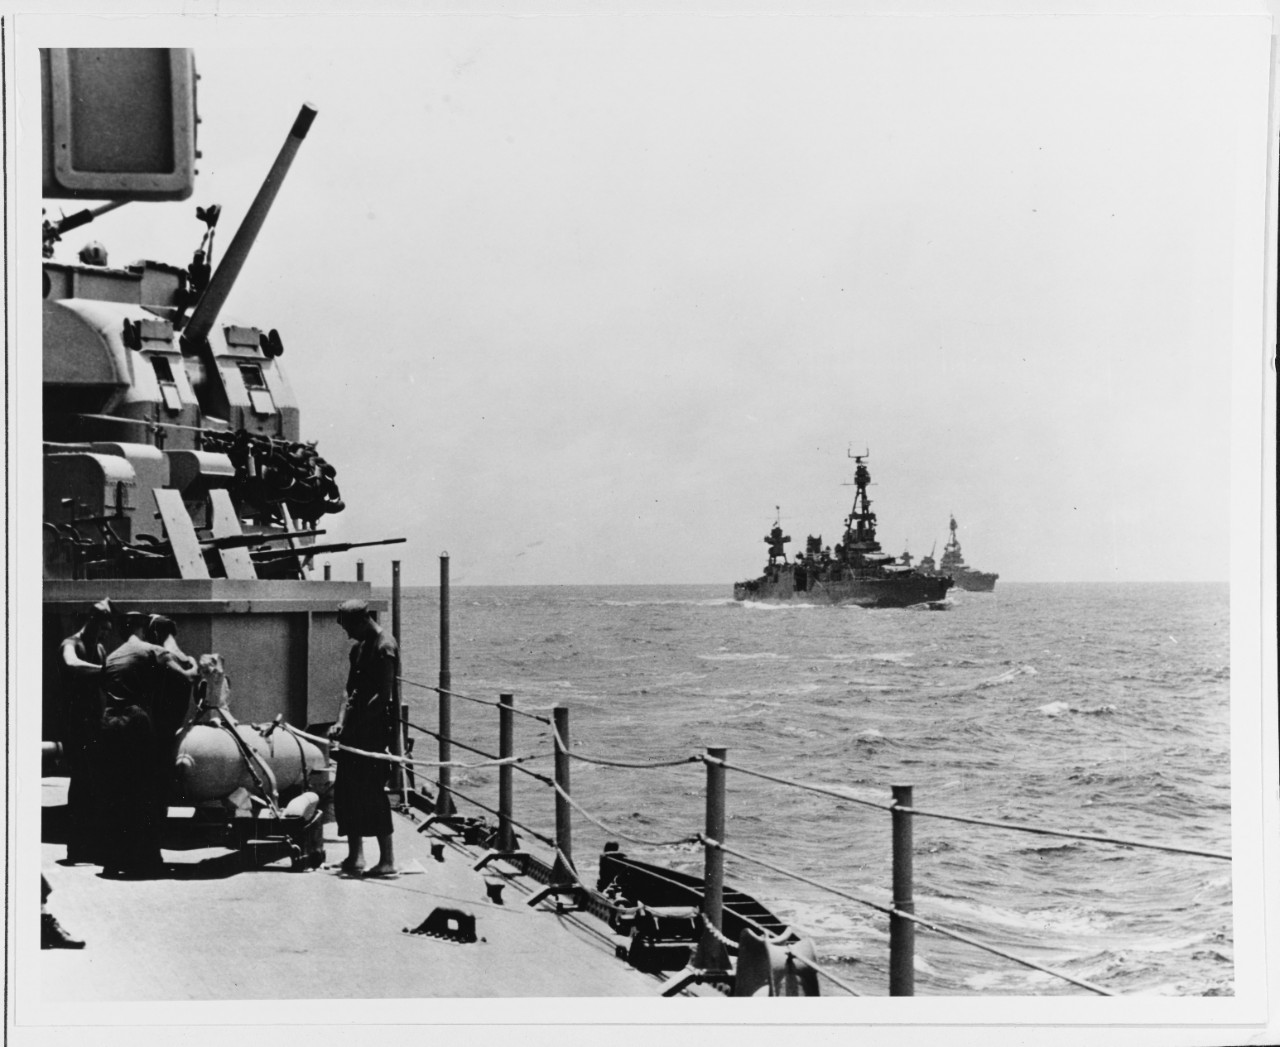
Chenango and Suwanee could only make a maximum of 18 knots and thus lacked the speed to enable Giffen to meet the destroyers as scheduled on the night of 29 January 1943, so at 1400 he detached the carriers, along with Frazier and Meade as escorts, and pushed ahead with the remaining ships at 24 knots. Chenango launched F4F-4 Wildcats of Escort-Fighting Squadron (VGF) 28 and a pair of radar-equipped Grumman TBF-1 Avengers of Escort-Scouting Squadron (VGS) 28, and Suwanee sent four F4F-4s of VGF-27 and three TBF-1s of VGS-27 aloft, all during the afternoon watch. The ships and their aircraft enforced strict radio silence, however, and the planes therefore operated ineffectively because of the lack of fighter direction. In addition, some of the other ships’ radar repeatedly detected aircraft flying at various bearings from the vessels, but they proved to be Allied planes in which their identification, friend or foe (IFF) transponders exasperatedly failed to register. The two carriers recovered the last of their planes by 1830.
Giffen meanwhile organized his task force into an approach formation in the event of engaging enemy ships, and also because Japanese submarines had repeatedly penetrated Allied screens and torpedoed ships, and intelligence reports indicated the likelihood that enemy submarines operated in the area. The sun set at 1847 and it became an overcast and very dark night, with a smooth sea and a ceiling of approximately 2,000 feet. The ships zig-zagged at 24 knots, and by 1920 reached a position near 10°48ˈS, 160°37ˈE. Montpelier, Cleveland, and Columbia (in order) led the port column of the formation at 2,500 yard intervals, and Wichita, Chicago, and Louisville the port column at 700 yard spacing. The screening destroyers steamed ahead and on the flanks of Montpelier and Wichita (clockwise): Conway, La Vallette, Waller, Edwards (DD-619), Taylor, and Chevalier. This configuration enabled the ships to make either a wedge or a “V” attack.
“This formation does not appear to have been the best for repelling an air attack,” the office of Fleet Adm. Ernest J. King, Commander in Chief U.S. Fleet, later analyzed the situation in Battle Experience Solomon Islands and Alaskan Actions January – February 1943. “The immediate threat was air, not surface, so it was not essential to maintain an approach formation. With our SG radar and destroyers properly indoctrinated, an approach formation could be quickly formed if surface contact by SG radar was indicated. A more compact formation by heavy ships to enjoy concentrated gunfire with an all round circular destroyer screen brought in to 2–3,000 yards might have been more effective.”
The Japanese detected the American ships and during the afternoon of 29 January 1943, launched a dozen Mitsubishi G3M3 Type 96 land attack planes (Nells) and G4M1 Type 1 attack planes (Bettys) of the 701st and 705th Kōkūtais, respectively, from Rabaul against the vessels, precipitating the Battle of Rennell Island. The first bombers reached the ships in late twilight at about 1924, while another plane rendezvoused with the bombers’ formation, flew ahead and dropped dim white marker floats at 200 yard intervals in a line parallel to the ships’ course about 5,000 yards toward the direction of the attack, and dropped red and green parachute flares that eerily lit the night sky in a second line perpendicular to the Allied course and at approximately the same distance.
The attackers swooped low over the ships and the lead Betty machine gunned Waller, which steamed on the starboard beam of flagship Wichita and Chicago and Louisville. The American ships tracked their attackers on radar and the plots “resembled a hornet’s nest.” A bomber flew through the formation with its guns blazing and Louisville fired her forward automatic weapons at the attacker, and another low-flying plane dropped a torpedo slightly forward of Louisville’s starboard beam at an estimated distance of 1,500 yards. Capt. C. Turner Joy, Louisville’s commanding officer, ordered “Hard left rudder,” and one of her lookouts watched the torpedo’s wake pass about 75 yards ahead of the cruiser. A minute or two later the ship shook violently as an apparent dud torpedo struck her hull. This bomber or another strafed Chicago and one of its bullets wounded Pvt. William L. Stander, USMCR, a 20 millimeter gunner, in the back. Stander undauntedly refused to leave his battle station when ordered to get under cover, and thereafter fired two additional magazines of 20 millimeter ammunition at the enemy until the firing temporarily ceased, and only then allowed his shipmates to relieve him while he sought medical attention, an action for which Stander received the Silver Star. The Americans responded to these attacks with heavy fire, and a plane plummeted into the sea and exploded in a fireball close aboard and to port of Waller. Two bombers approached from two points abaft of Chicago’s starboard beam, and one launched a torpedo at a range of 500 to 600 yards. These two aircraft crossed ahead of Chicago and seemingly escaped undamaged. Immediately thereafter, another plane crashed off Chicago’s port quarter, and the attackers appeared to wing off.
The vessels ceased zig-zagging at 1930 but a minute later more Bettys flew out of the night and pressed their assault against the heavy cruisers steaming in the right van of the task force. Some planes blinked their lights, apparently in an effort to draw U.S. self-disclosing fire in the Stygian gloom, and others, in addition to flying their bombing runs, strafed the ships to draw fire. Two planes headed for Chicago and antiaircraft tracer rounds flashed brightly as Louisville downed the first with automatic weapons fire close aboard off Chicago’s port side, and gunfire splashed the second off Waller’s starboard quarter. The light from the Japanese flares and the glow from the burning aircraft silhouetted Chicago, however, and another plane dropped a torpedo that sliced into her starboard side, forward at 1940, in way of the after engine room, stopping three of the cruiser’s four drive-shafts. Another plane flew toward Chicago from starboard but appeared to crash into the cruiser’s CXAM-1 antenna, broke into flames, and crashed just off her port bow. A bomber made an identical approach on her and both Chicago and Wichita fired at the plane and it burst into flames and plunged into the sea just off Wichita’s port quarter. That plane or another dropped a torpedo, however, and the second weapon slammed into Chicago’s starboard side at about frame 80 at 1946, sending a column of water nearly 150 feet into the air, and flooding No. 3 fireroom and the forward engine room. Two minutes later a plane flew toward Wichita from slightly abaft the port beam and passed just ahead, and both Wichita and Louisville shot at the intruder and a 20 millimeter round from Louisville exploded on the top of Wichita’s Turret III and No. 8 5-inch gun. A plane dropped a bomb that splashed into the water broad on Wichita’s bow about 150 yards away. The force reversed course 180° to 120° and reduced speed to 15 knots. Water poured into Chicago’s compartments from bulkhead 64 to about 112, a distance of 192 feet or nearly a third of the ship’s length. The ship’s rudder locked at 10° left, she lost steam, and drifted dead in the water.
Chicago’s crewmen grimly set to work repairing the damage, and heaved overboard fragments scattered on the deck. The Americans continued to fear enemy air and submarine attack and sought to escape from the area, but the increasing darkness cloaked the ships and they fired only on definite targets, a ploy that appeared successful because although their radar continued to track enemy planes until just before midnight, none of the aircraft attacked again. Louisville, in a masterful piece of seamanship, took her damaged near-sister ship in tow using 60 fathoms of starboard chain and her towing hawser, while in complete darkness during the first watch, and, by early the following day, passed the tow to tug Navajo (AT-64). Chicago’s crewmen laboriously restored some steam and the damaged cruiser limped along at four knots to Espíritu Santo. The ship listed ominously 11° to starboard and her deck there was awash, and she gradually settled by the stern.
Hundreds of men bailed and passed buckets of water, and as they cleared out water from some of the compartments aft, other men located leaks and used wooden plugs and stoppers to battle the inflowing sea, and shored bulkheads. Crewmen cleverly used a boiler to shift fuel from the starboard side of the ship to port, which partially restored her to an even keel. Carpenter Albert A. Bartholomew received the Navy Cross for his “extraordinary heroism” when he entered a compartment flooded with about five feet of fuel oil and water, and swam nearly 30 feet through surging liquid and in a heavy concentration of oil fumes, and closed an open water-tight door in order that the compartment might be freed of water. Bartholomew did so while the “buoyancy and stability of the ship was such that she would sink unless water were removed.” Sailors brought the rudder amidships by opening the equalizing valves in the hydraulic system by 0100, and then locked it in that position. The crew still fought substantial flooding amidships, but as the ship’s company battled the sea they stopped the settling about six to eight feet of freeboard at the stern, and men began to look with renewed hope that they might make landfall. Additional ships rendezvoused with the task force and during the afternoon watch the cruisers, escorted by Chevalier and Taylor, detached for Havannah, leaving Conway, Edwards, La Vallette, Waller, high speed transport Sands (APD-13), and Navajo with Chicago, steaming a southeasterly course.
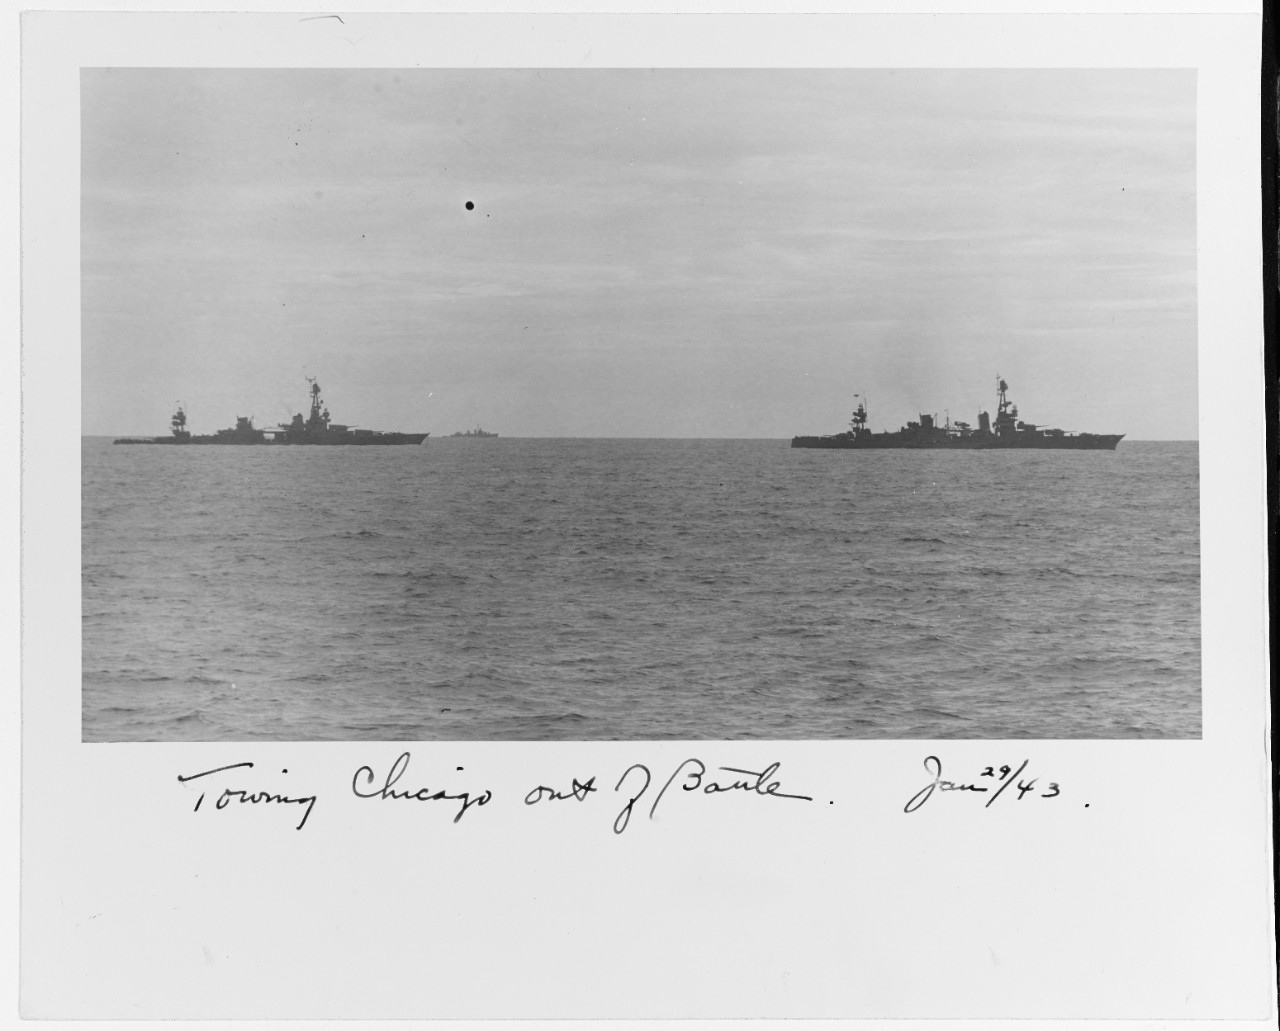
Suddenly, at 1445 on 30 January 1943, the Allies reported 12 Bettys of the 751st Kōkūtai, Lt. Cmdr. Nishioka Kazuo, flying south of New Georgia toward Rennell Island. A flight of F4F-4s of VF-10 on CAP from Enterprise and antiaircraft fire splashed as many as seven of the 11 attackers (one apparently aborted), but the survivors flew through the storm of bursting shells and bullets and Bettys dropped five torpedoes, four of which tore into Chicago’s starboard side, between frames 33 and 80. One of the weapons rent the ship near sick bay, tragically sealing the fate of the men trapped within, and the fifth torpedo passed astern. The crew gallantly but unsuccessfully fought the ship but could not control the flooding, and she listed to starboard and began to settle. “I’m sinking” Chicago forlornly signaled and her crew abandoned ship. Lt. Joseph T. Yavorsky afterward received a letter of commendation for bravely venturing below decks and searching wrecked compartments to insure that no trapped or injured men that he could locate remained behind. Chicago rolled over slowly on her starboard side and sank stern-first at 1644 on 30 January 1943, about 30 miles east of Rennell Island near 11°26'S, 160°56'E. Most of the survivors went over the side into life rafts, but some escaped in a variety of contrivances, and Lt. Brown reattached the lid to a powder can and threw it overboard and used it as a flotation device, becoming one of the 1,049 survivors that Conway, Edwards, Waller, Sands, and Navajo rescued. Navy evaluators observed that “in order to absorb such damage [the first two torpedo hits] and remain afloat, damage control measures must be initiated promptly and intelligently and executed efficiently. It is unfortunate that the determined and exemplary efforts of the officers and crew in this case were vitiated by the overwhelming effects of the second attack.”
In the mêlée, a Betty also dropped an aerial torpedo that sliced into La Vallette’s port side at frame 94 in the forward engine room. The destroyer lost 22 men killed but emerged from the fray and reached Espíritu Santo under tow, where she completed temporary repairs in a dry dock, and then more extensive work at Mare Island. The U.S. transports eluded the fighting and brought the soldiers to Guadalcanal. The Japanese turned back the U.S. task force during the battle, however, which helped them to evacuate their remaining troops from the island during the first couple of weeks of February. Rear Adm. Hashimoto Shintaro concluded the bitter six-month struggle for Guadalcanal and the neighboring islands when he led destroyers that pulled out the last 1,796 Japanese troops on the island on 8 February. Chicago was stricken from the Navy Register on 22 February 1943.
Chicago (CA-29) received three battle stars for her World War II service.
| Commanding Officers | Date Assumed Command |
| Capt. Manley H. Simons | 9 March 1931 |
| Capt. Herbert E. Kays | 25 March 1933 |
| Capt. Reed M. Fawell | 30 August 1934 |
| Capt. Herbert B. Riebe | 22 June 1936 |
| Capt. Abel T. Bidwell | 25 June 1938 |
| Capt. Marion C. Robertson | 16 December 1939 |
| Capt. Bernhard H. Bieri Jr. | 1 February 1941 |
| Capt. Howard D. Bode | 17 January 1942 |
| Capt. Ralph O. Davis | 15 December 1942 |
Mark L. Evans
15 June 2017
